Hi,
this is a bold title. So i’d like to show how much i owe to the stridaforum.com. Without this forum, i’d have bought one or two Stridas and i would not have known there is a design issue for quite some time. Maybe until it’s too late to find an affordable and practical solution.
The Achilles Heel has already been discussed here in the forum and in the Strida community.
Fist of all, I’d like to mention @Bill_Wilby of Strida Canada West, who discussed the rear hinge in: Strida Bike’s Rear Hinge Explained
@Blackstridaaustria did so much for us!
Please refer to:
rear hinge reinforcement - heavy duty,
Rear hinge – finally the sad truth (Note the detailed description of tolerances in the start post),
Cracking noise (You might wish to goto this post directly)
Finally, together with @Mark_Sanders , @BSA offered a solution called the:
Rear hinge 2022 – TriLock system, for all Strida versions
I only contribute because
a) The TriLock appeares to be out of stock so we’re down to: “What can i do?” once more.
b) As i studied civil egineering i’d like to contribute a detail or two, that have not been covered by now.
Now here’s my solutions (there are two versions depending on the protruding length, that is how much the axle stands out of the countour of Your bottom tube)
But before we go to the very details of two different solutions, commons first!
Before we apply a solution for the Achilles heel, first check the condition of the large plastic spacer (166-1) between Your seat tube and bottom tube.
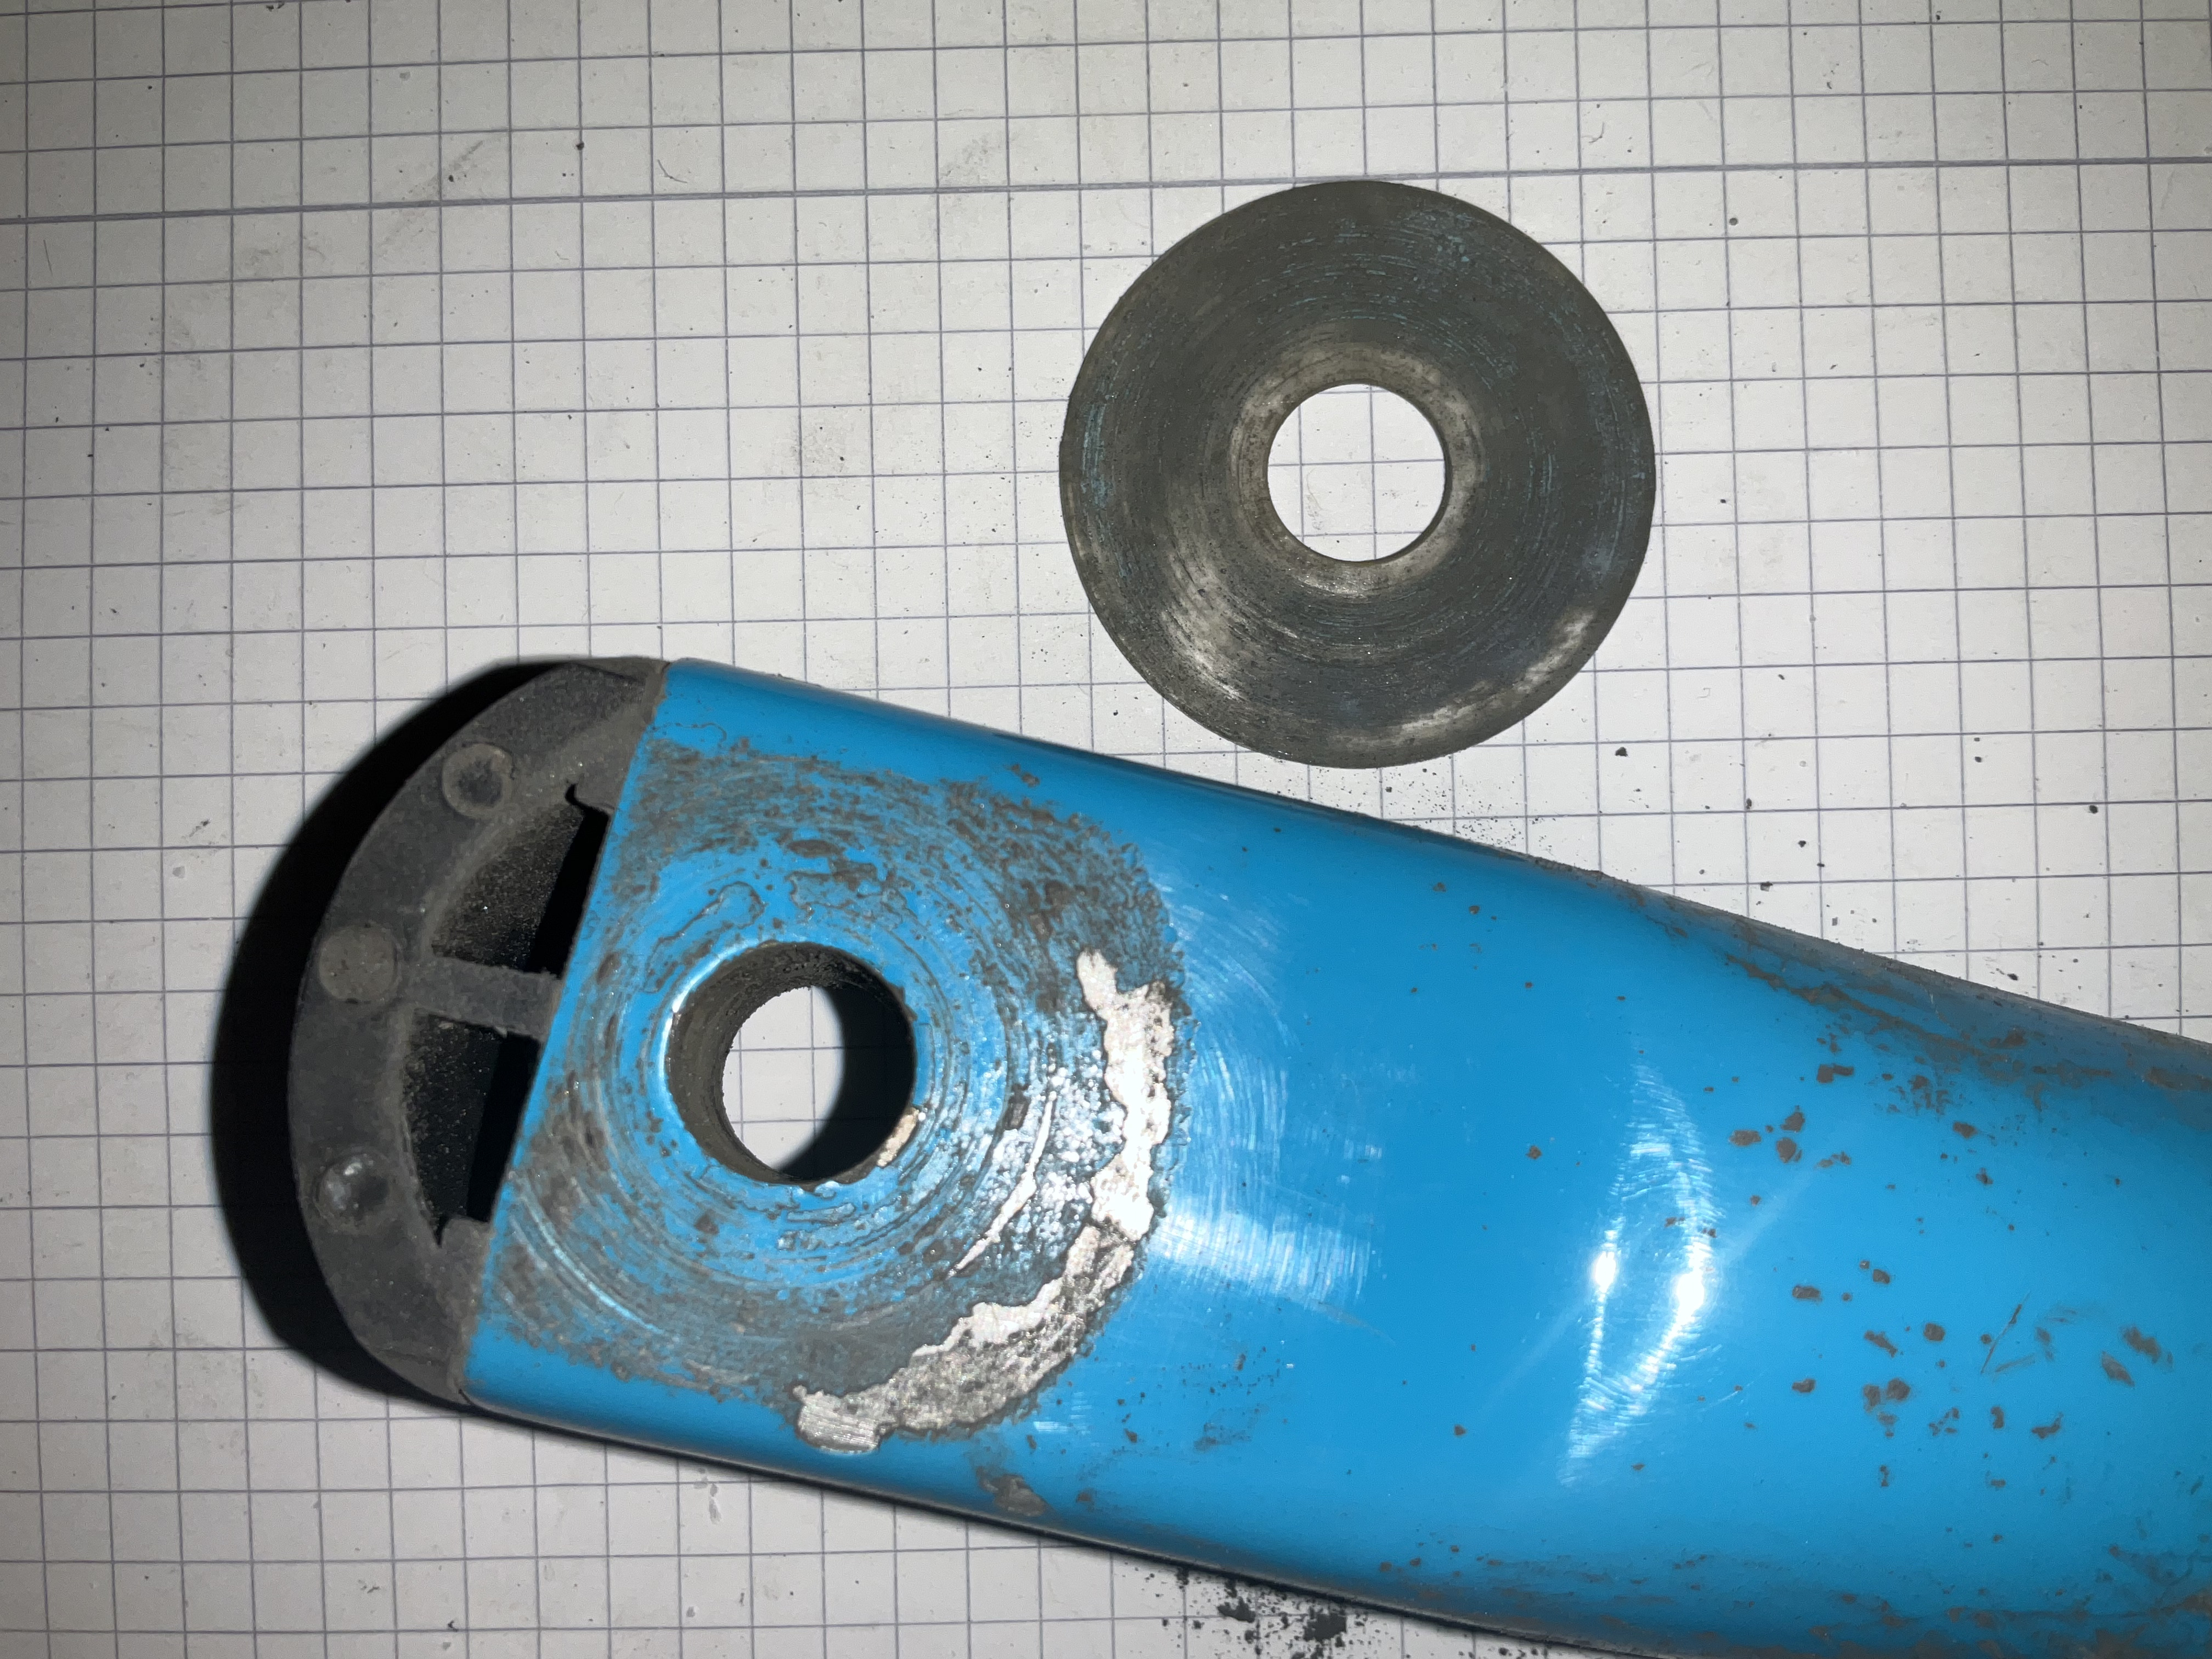
Pic. 1: spacer 66-1 and tubes in dirty condition.
My spacer was quite dirty and this is the consequence of having not enough tension (pressure) in the rear joint so abrasive mineral dust coul settle in the gaps between parts. According to the condition of Your spacer and tubes, You’ll need to clean or replace the spacer and clean or maybe even smoothen Your tube surface areas before we proceed.
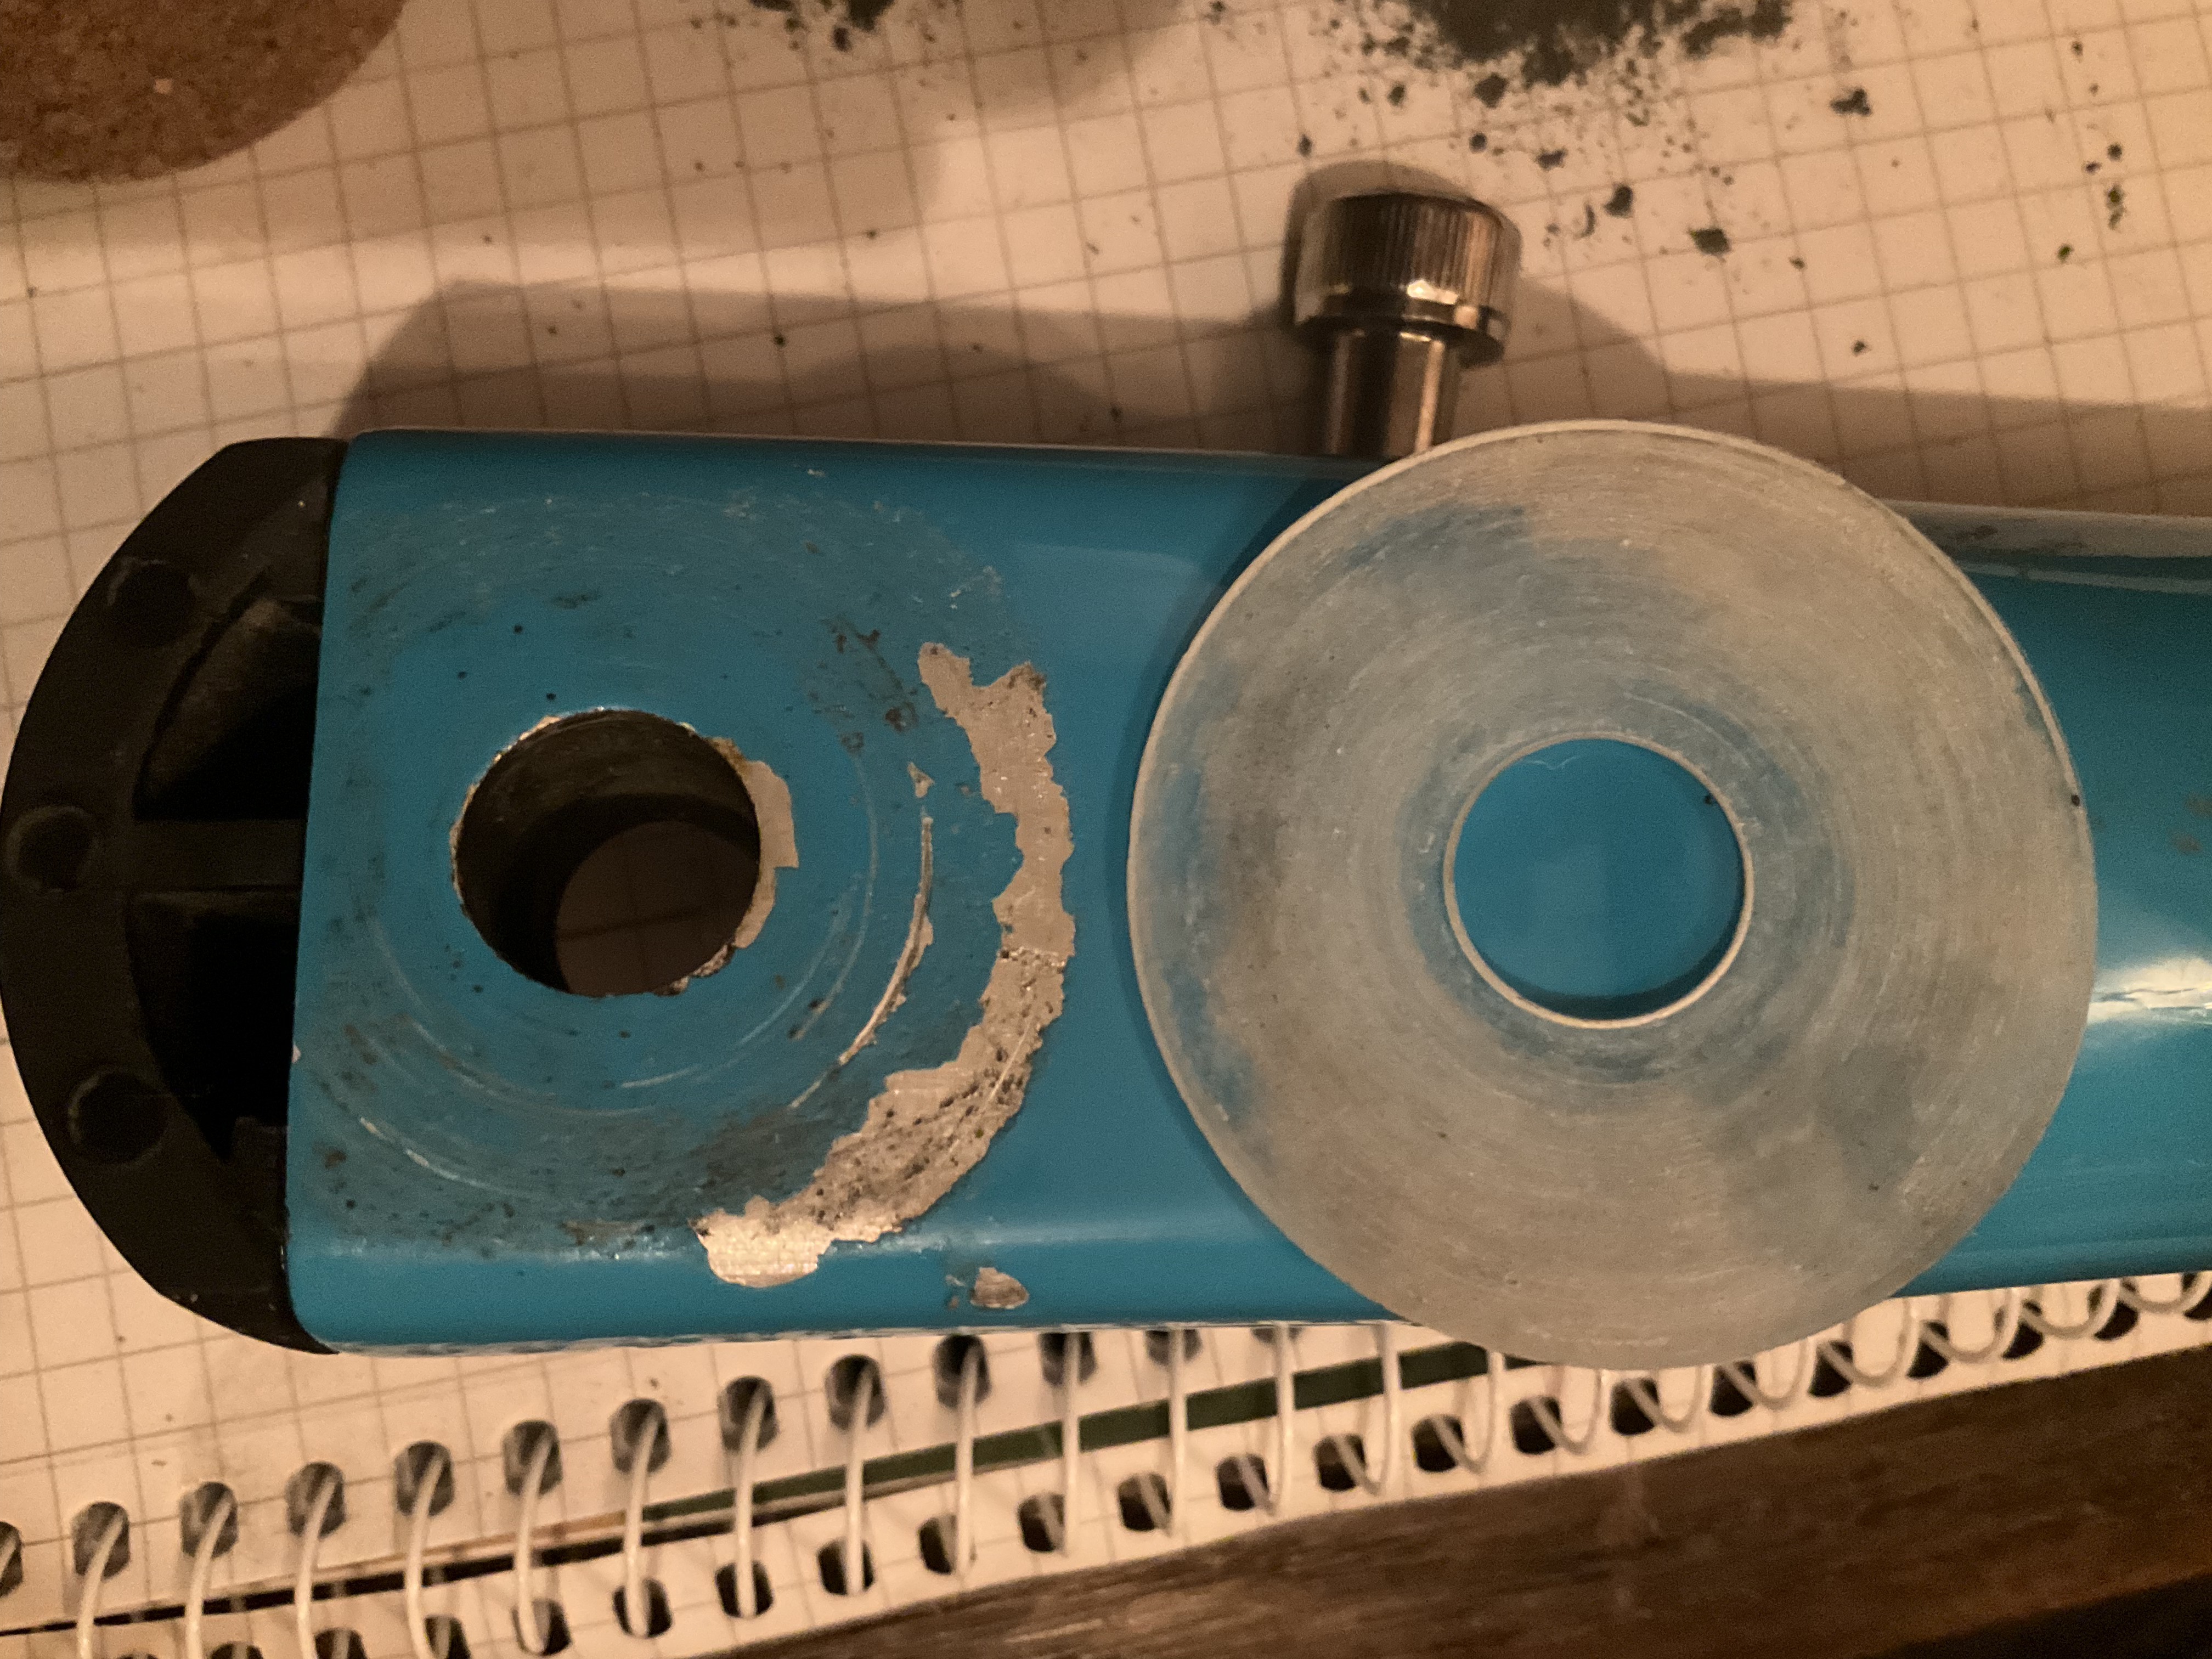
Pic. 2: Good enough for me.
On my 18" Strida, cleaning everything was good enough to get going. I applied graphite grease on all of these surfaces before i joined the parts together again.
Tension:
Using my torque wrench i checked how the connection would feel according to different torque on bolt 373.
Even at 2 Nm of torque, the connection felt quite snug. 3 Nm felt crisp and at 5 Nm it fet like very much pressure.
However, the graphite grease made much of a difference here so we just figure out, how much pressure we’d like to have on our rear hinge.
For me it’s fine, if the bottom tube does not fall down if i let go of it. I don’t like the tube to drop to the ground like in a free fall and i pefer, if the tube stays put, should i let go of it: Friction stronger than gravity!
Without graphite grease this is achieved with a very low amount of pressure (bolt 373 at 2 Nm of torque) on the connection of the tubes. With graphite grease, the friction stronger than gravity approach gave quite a decent pressure on the rear hinge. It took 7 or 9 Nm on bolt 373.
I recommend You grease the spacer and tubes in the rear hinge as it leads to higher but still reasonable pressure on the link and the grease should help to keep dirt out of the way.
General principle / approach
It seems, the Strida community assumes that ming cycles uses the cup spring as a spring, that is to provide axial elasticity to the rear joint.
I don’t think it is true.
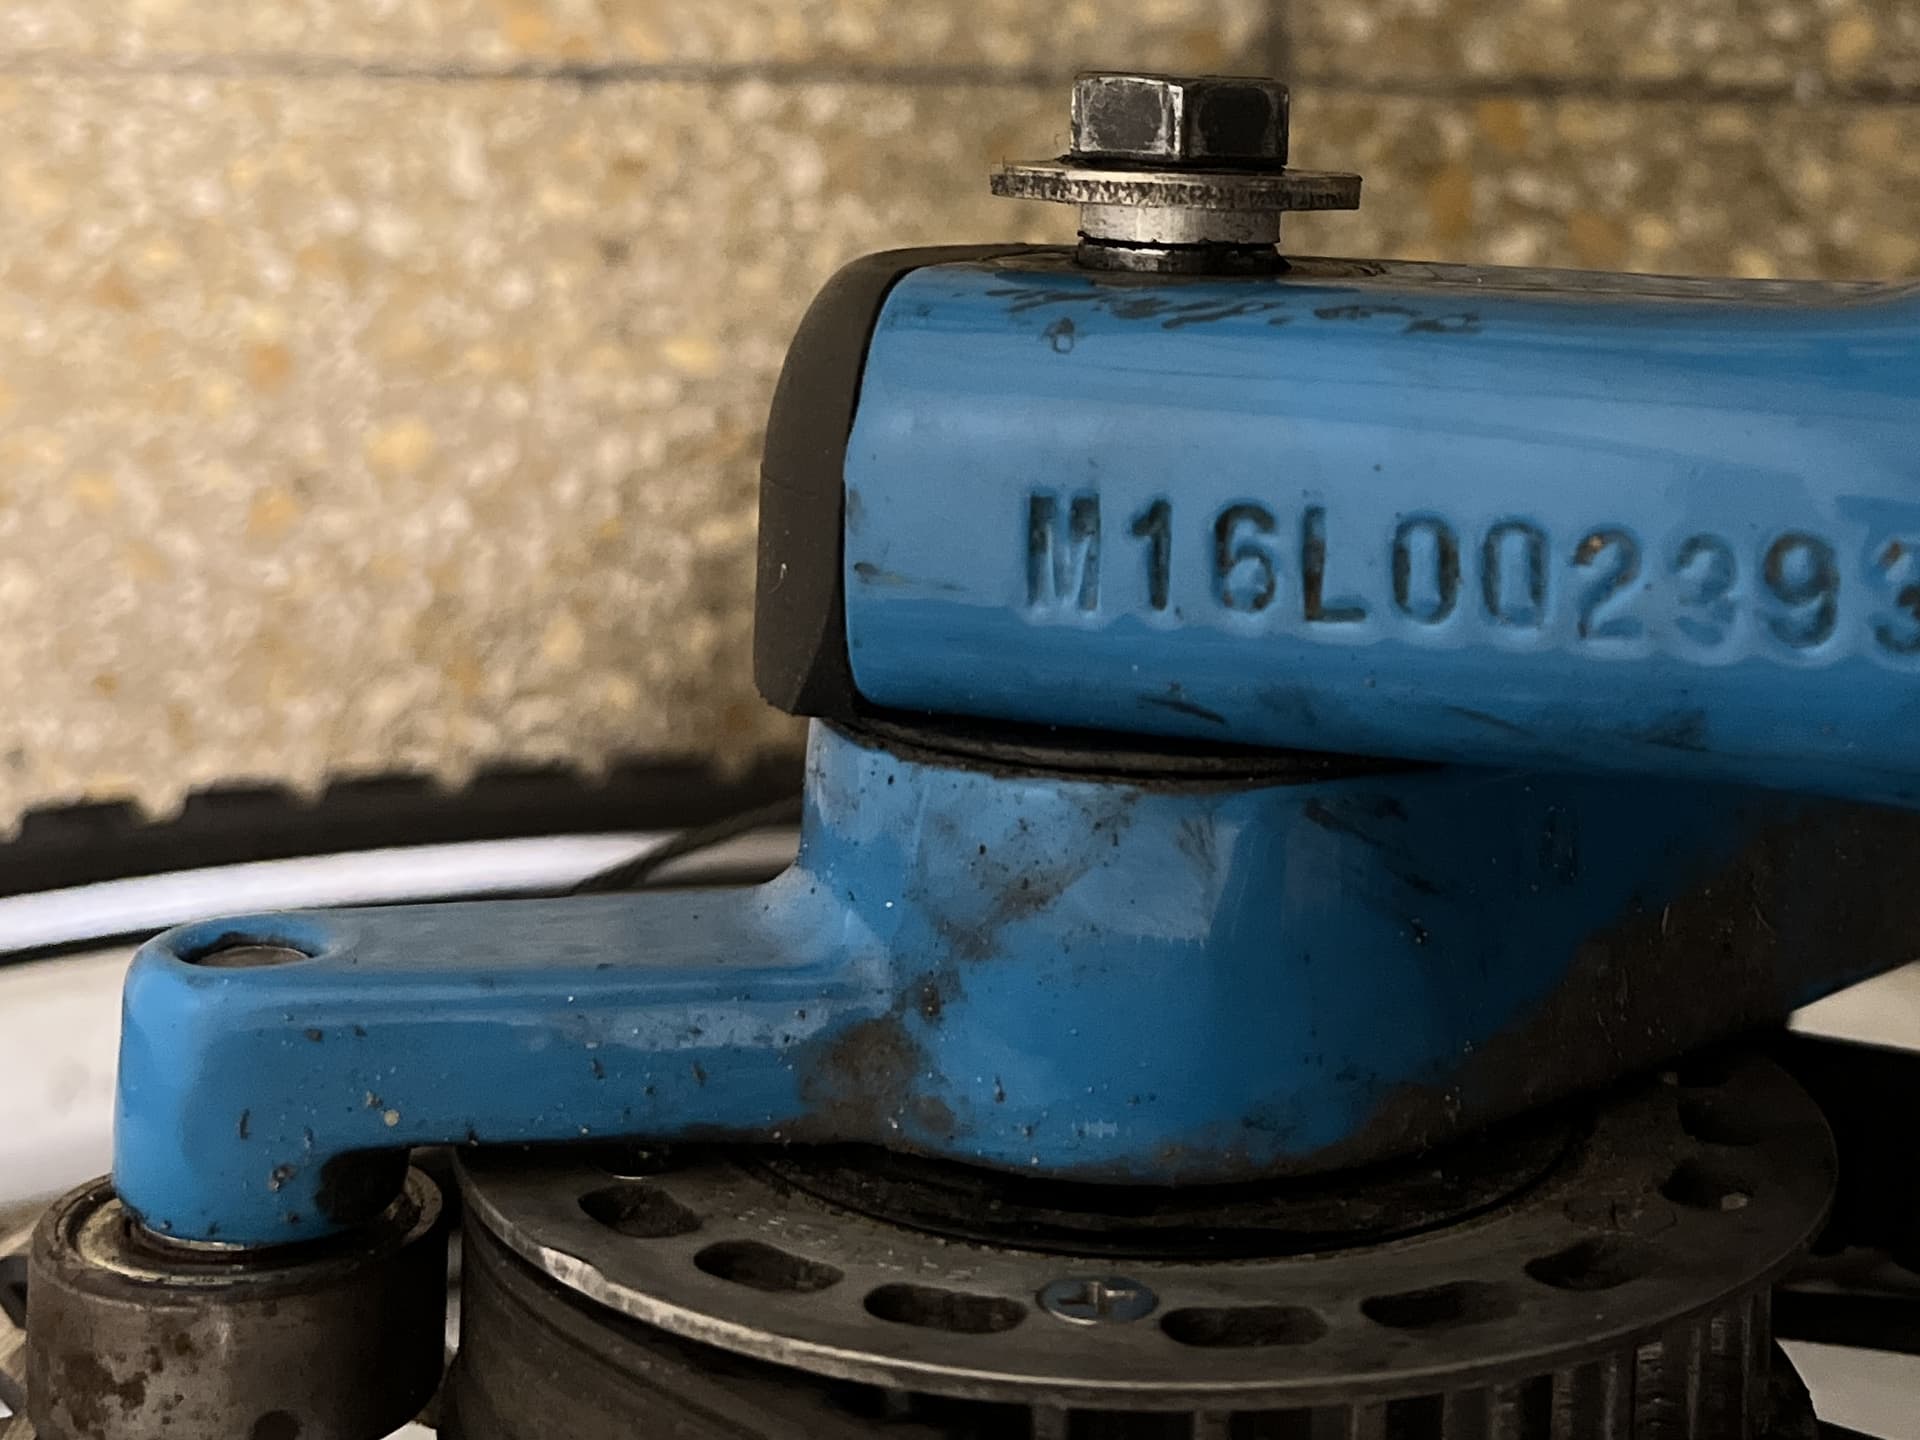
Starting with the 8mm thread in the axle (part 340-080 or 473) the force applied to this thread by bolt 373 is the same as the force applied by the axle to the bolt. That’s Sir Icaac Newton and. “actio = reactio”.
So the force between axle and bolt, bolt and washer, washer and cup spring, cup spring and bottom tube, bottom tube and spacer, spacer and seat tube are all the same. I call it force F.
The cup spring has an inner diameter of 12 mm and an outer diameter of 29 mm.
So with the friction coefficient μ (friction between the different surfaces) the momentum the connection can transfer is F x μ x r, where radius r is 1/2 of the diameter. So, on the narrow side of the cup spring, diameter 12 mm, radius 6 mm, the momentum will be F x μ_i x 6 where on the wide side of the cup spring the momentum will be F x μ_o x 14,5.
I think, the engieers at ming cycles chose a cup spring to determine, where the pivoting point in the rear hinge will be.
The cup spring is way too stiff (axial direction) to provide elasticity to the hinge and the engineers will be well aware of this.
Still there is an issue because the cup spring digs into the surface of the comparably soft aluminum of the bottom tube. And more to it! The smallest radius in this actio = reactio chain is the thread between axle and bolt 373. True, the thread has surfaces that are not perpendicular to the axial force. There is in a first order approximation for the effective radius r_eff = r_thread / cos(30°), but the thread is still the pivoting point, was it not for thread adhesives (loctite or the like).
Now
- first, i like to apply elastic material to finally have some elasticity in the rear hinge and
- second, i like to solve the actio = reactio problem.
The latter is easy: If the bolt 373 makes tight contact to the axle, the torque can be increased greatly without moving a fraction of a mm. Here’s where we might apply a custom spacer.
The first issue, elasticity, is up to our phantasy and trial and error. I tried 0,5 mm TPU material that You can buy as a puncture protection liner (puncture protection pad, anti puncture pad …) and pieces of an old butyl rubber tube.
Tests using elastic material and a cup spring - even though it was carefully ground flat on the wide side and carefully deburred - gave bad results.
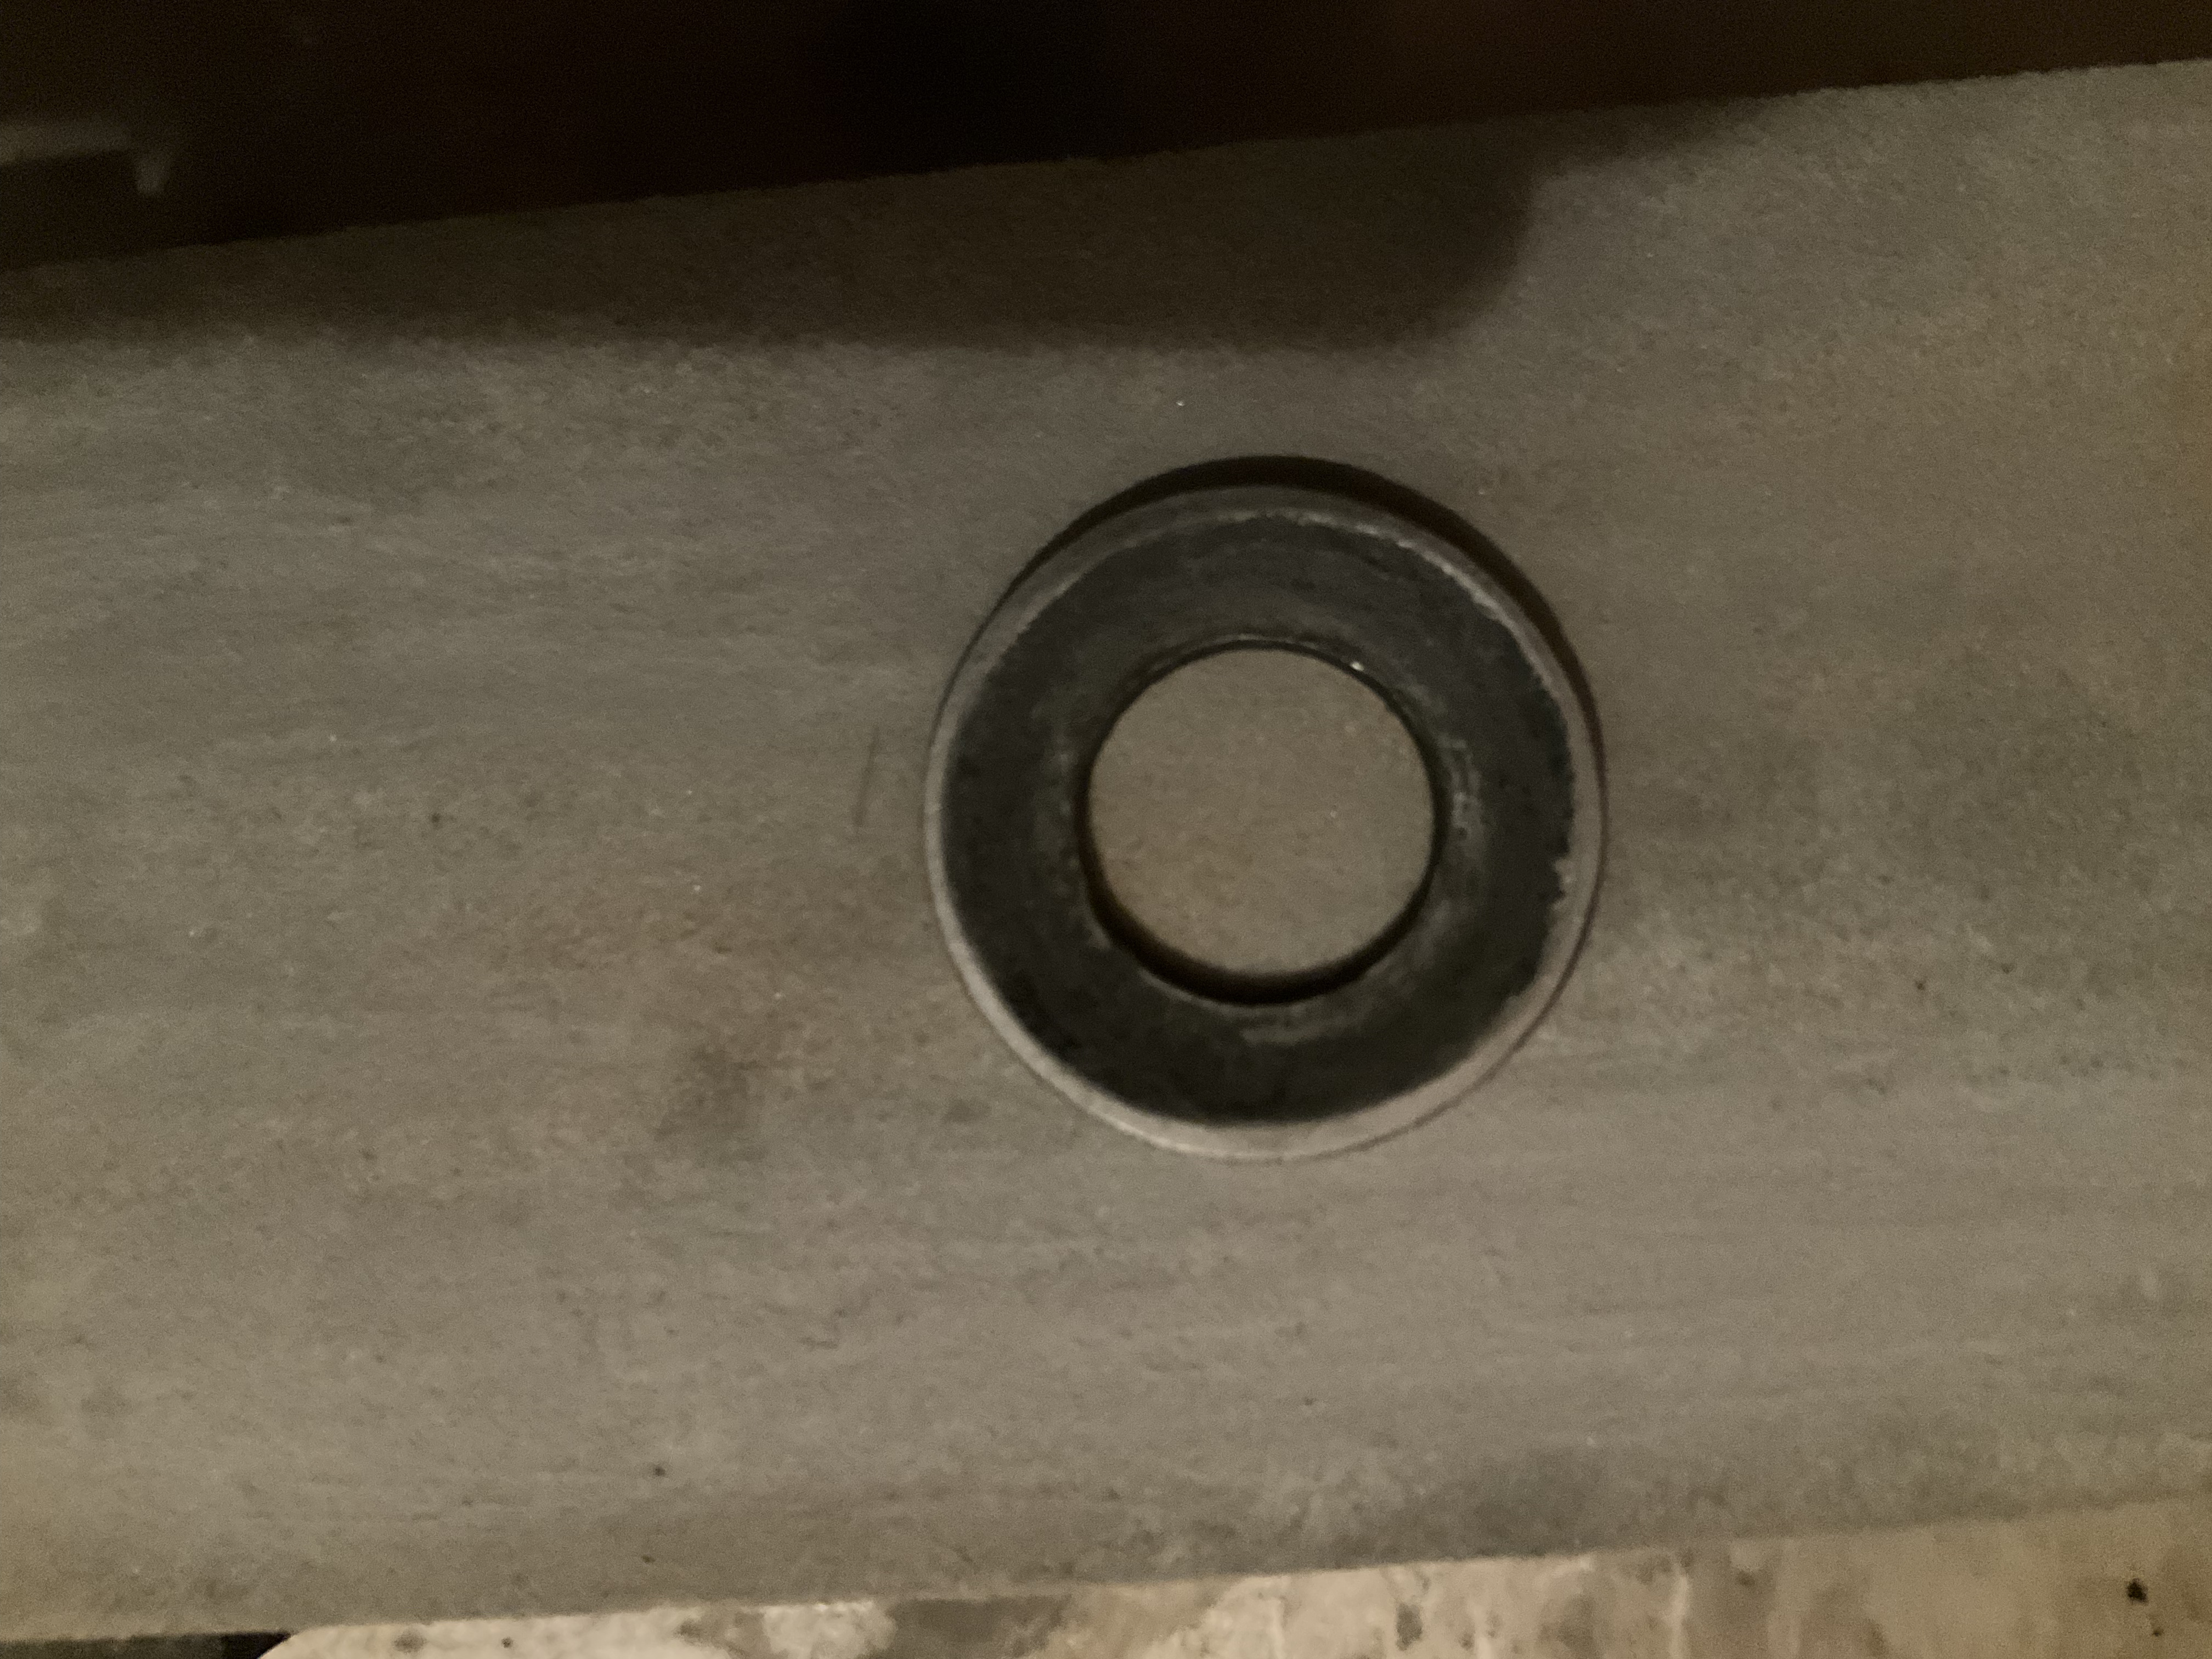
Pic. 3: cup spring flattened out on the wide side and carefully deburred. There is no sharp edge here anymore.
It just doesn’t work. The cup spring is like a very shallow dome and the elastic materials i tried would be destroyed in the contact zone and move to the center, where the dome is higher.
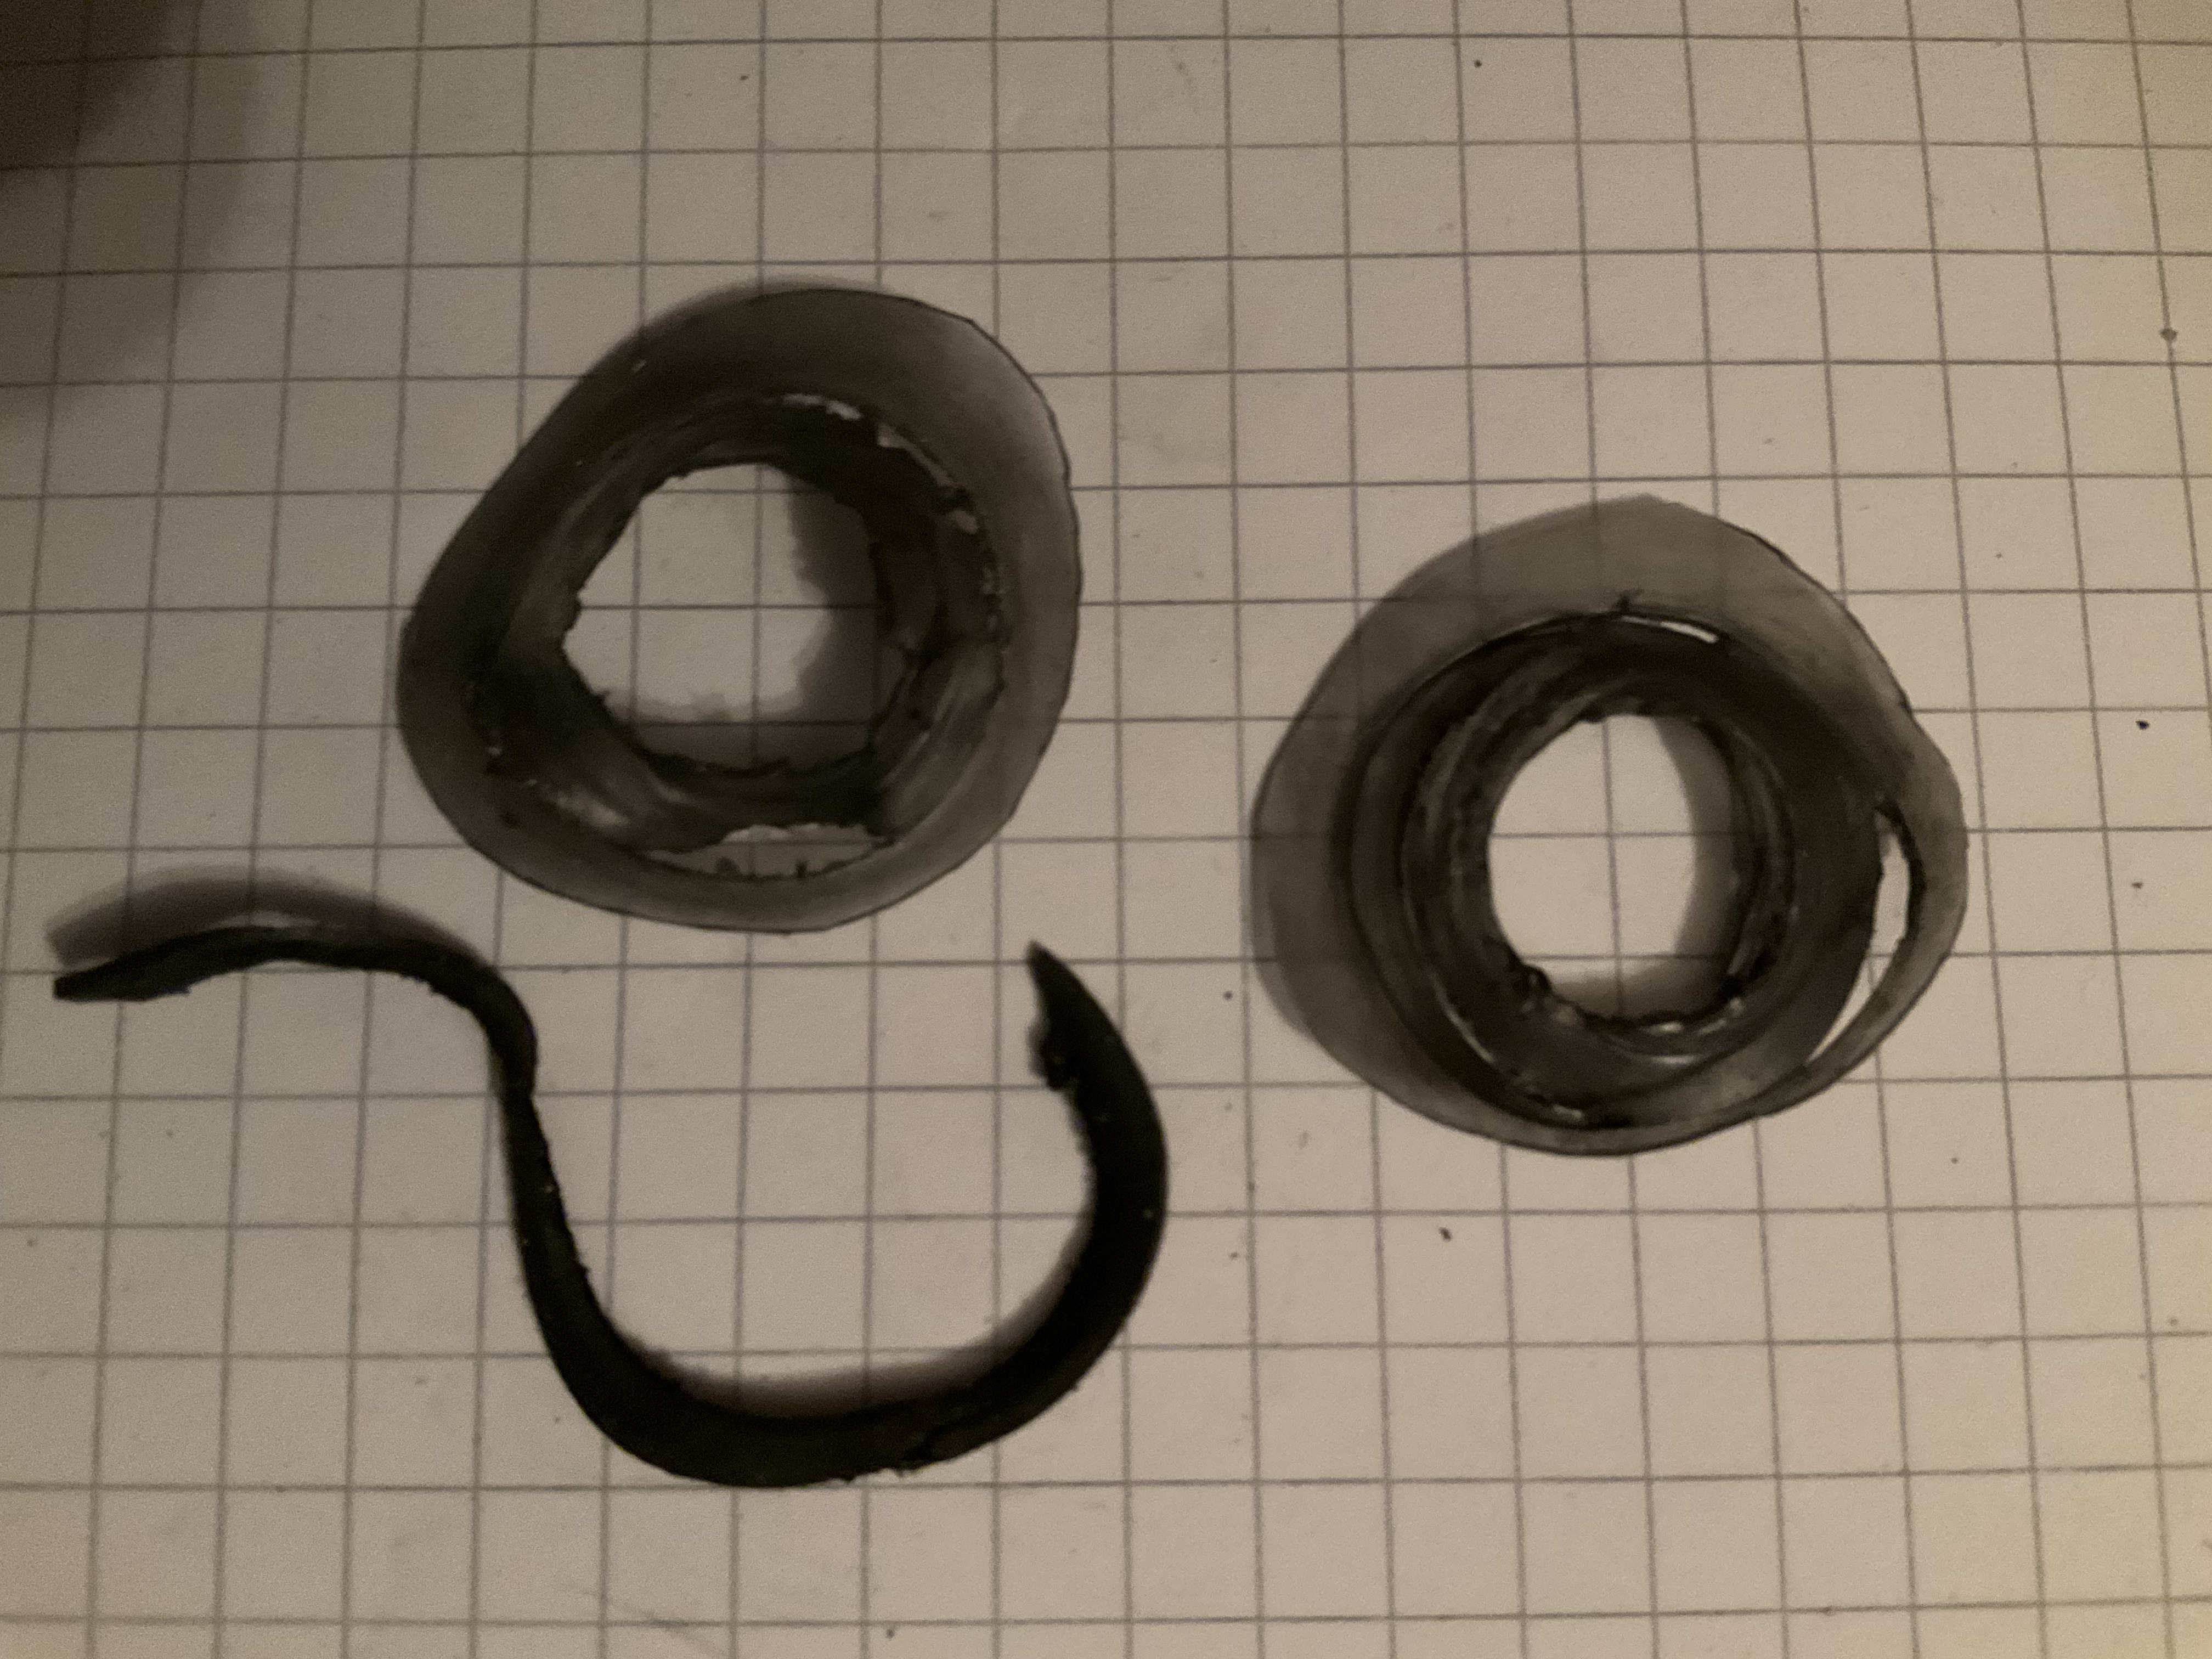
Pic. 4: What a carefully prepared and deburred cup spring does to fairly robust elastic material
So, forget about a cup spring here!
Like @Blackstridaaustria had already suggested in rear hinge reinforcement - heavy duty a large flat washer is the way to go.
So i did exactly this.
I found an extremely wide 6mm washer with an outer diameter of 30 mm and used this to apply pressure on the elastic material utilising a much larger surface area.
What do we do?
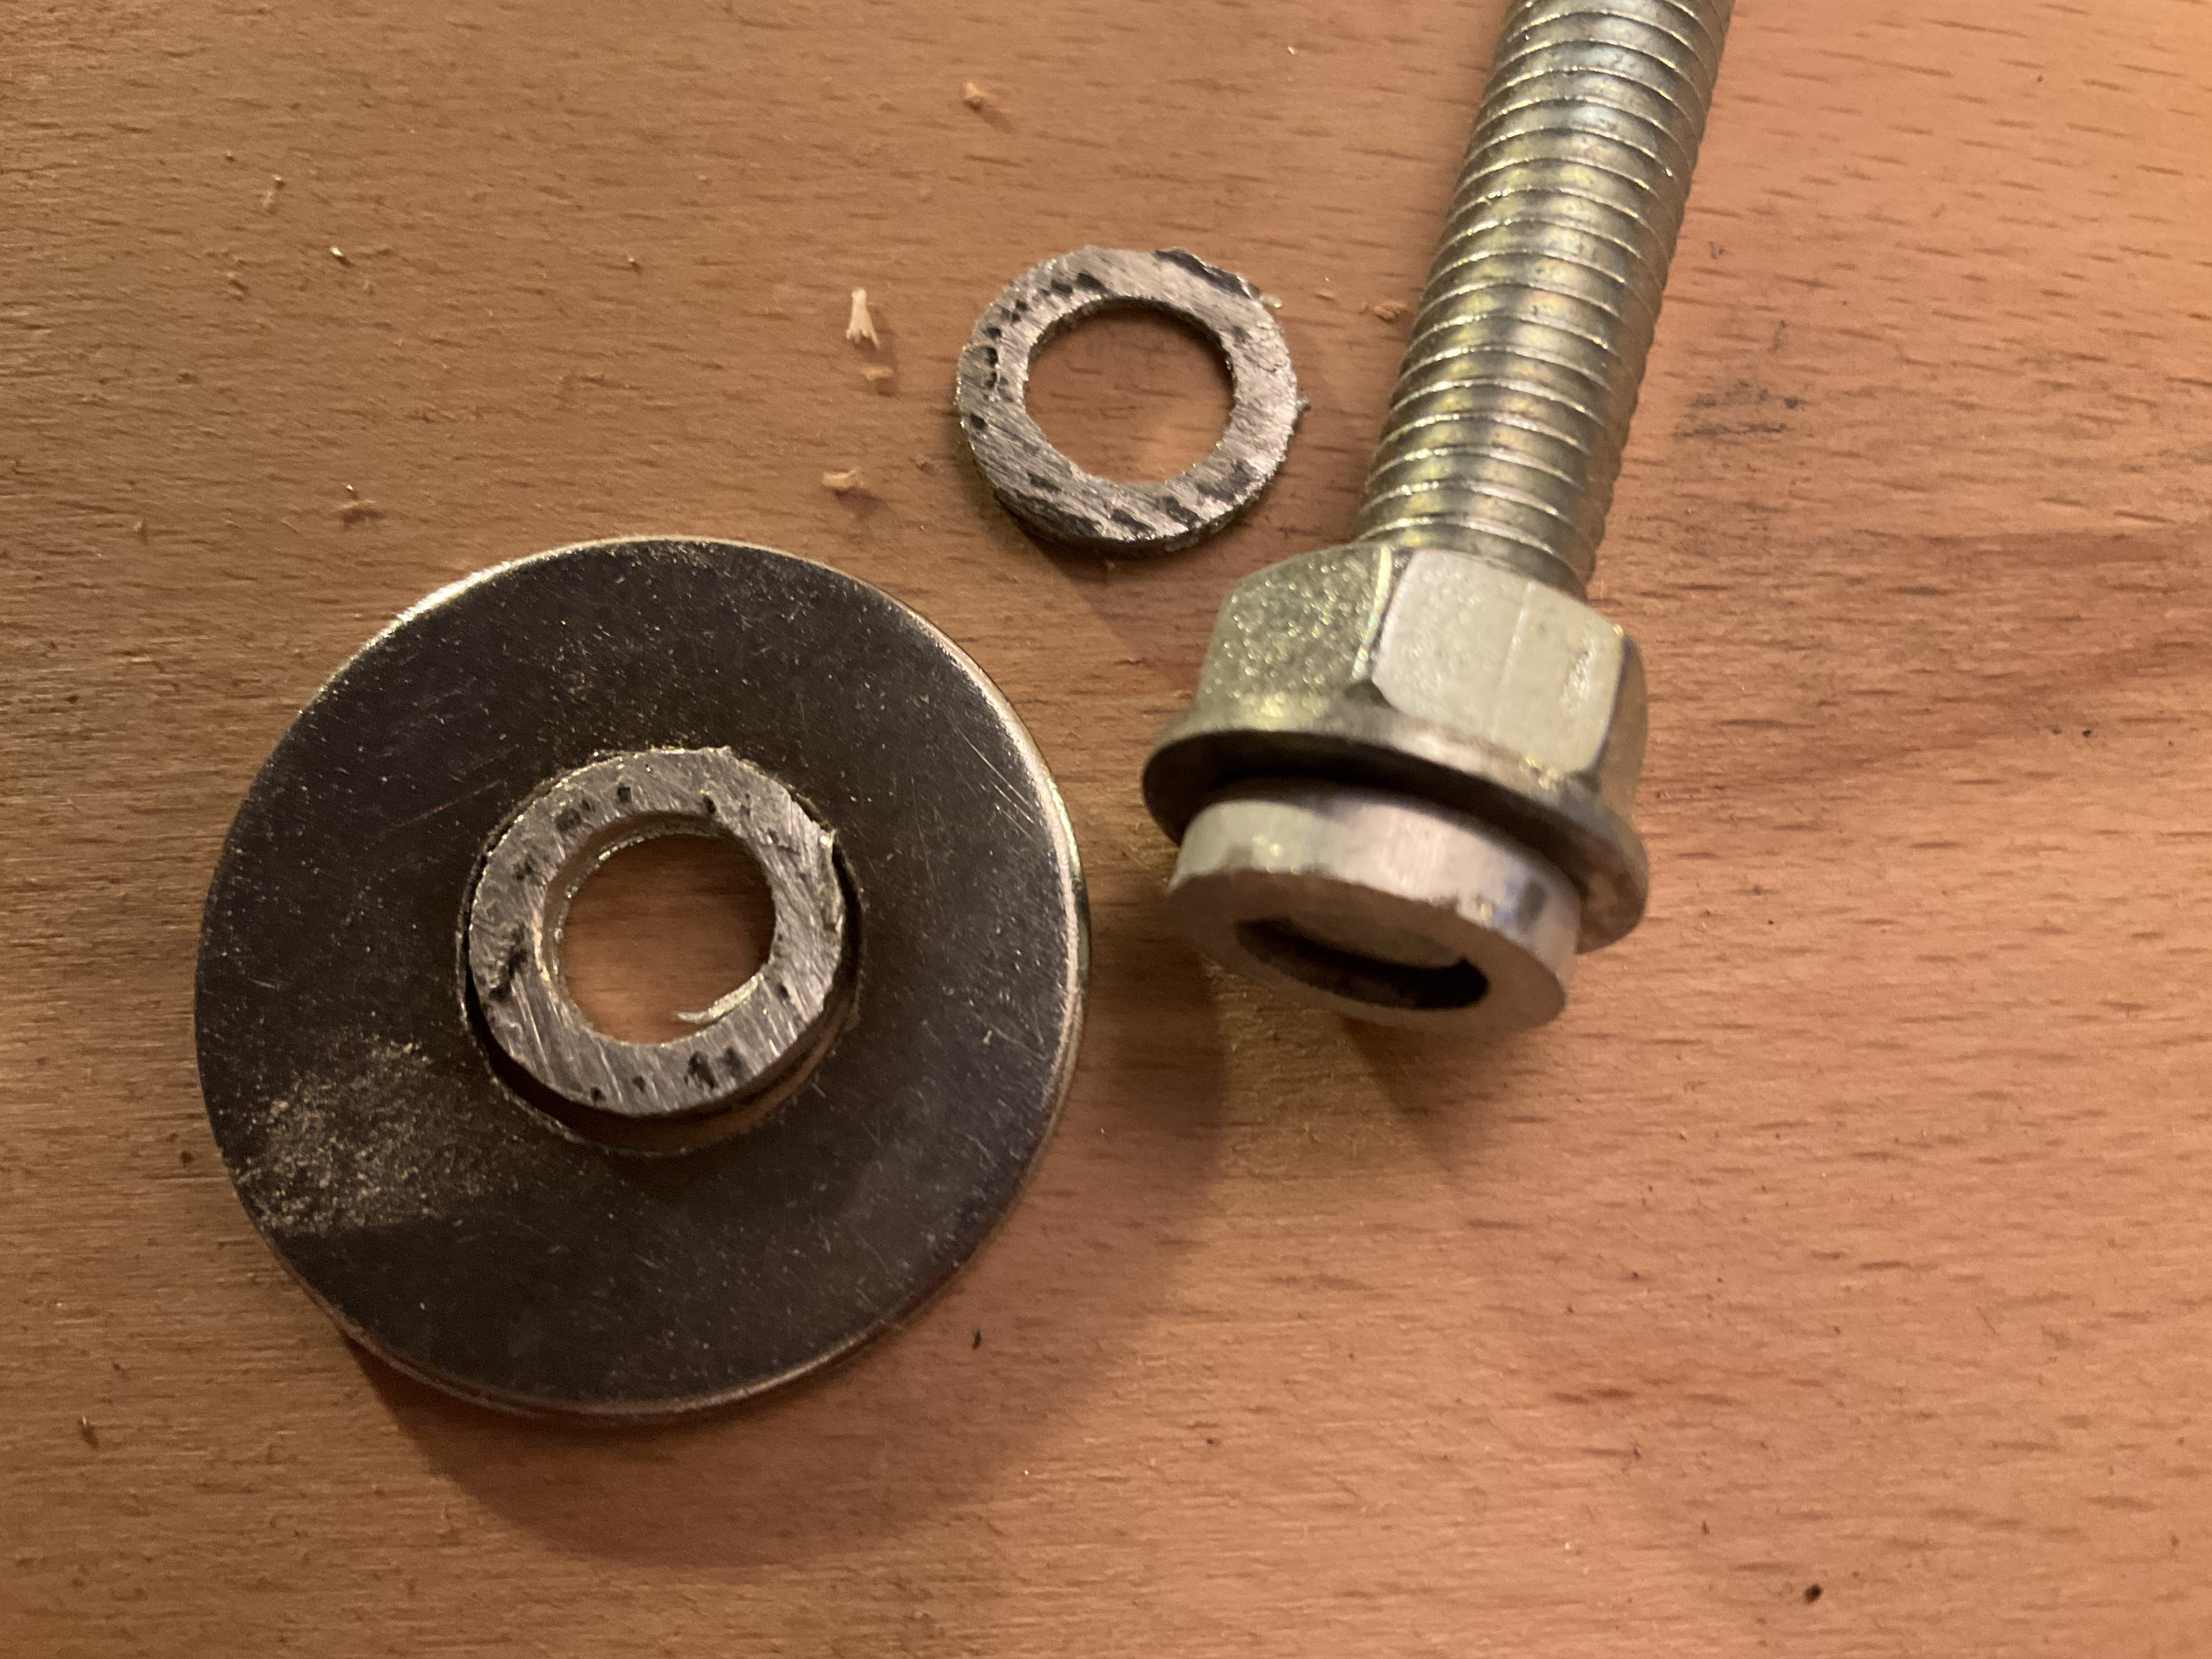
The axle has a 12 mm diameter and te M8 bolt has 8 mm of diameter obviously. An 8 mm by 12 mm spacerer will connect the axle where a 12 mm washer will be (radially) guided by the 12 mm axle and be axially free.
Pic. 5: 8 mm washer or not: we produce a 12 mm axle with a specified protruding length.
You can clearly see the bright 8 mm aluminum washer i produced for demonstration. It’s 2,5 mm thick just for You to easily spot it in a picture.
That being said, the concept i introduce here uses at least one large 12 mm spacer that distributes the force F to a large surface so the tension (force divided by surface area) goes down to what our elastic material can bear.
It uses one or more layers of elastic material so we can find a solution that fits beween the 8mm washer and the bottom tube. With or without an addiional custom made 8 by 12 mm spacer to elongate the axle. In my example here, the protruding length is 1,6 mm and the 8mm spacer is 2,5 mm thick so we would have 1,6 + 2,5 = 4,1 mm of space between bottom tube and the 8 mm washer to fill in 12 mm washers and layers of elastic material. I doubt, someone will need to use that much space. However, as it is increasingly difficult to go much below 1 mm of thickness of the spacer, what You see here, are probablythe extreme values. A practical solution will most likely be somewhere inbetween.
Now, we’re ready to go. The rest of the solution is some trial & error with elastic materials and washers.
Solution 1 for sufficient protruding length (maybe no custom spacer necessary)
With a sufficient protruding length You don’t need a custom made spacer. I had mentioned (there) that i had ordered a 12x2 mm aluminum tube to manufacture me the spacers You might need to get along with Your Achiles heel.
With a protruding length of 1,6 mm i am already on the lucky side!
I found a 6 by 30 mm washer that is only 1,2 mm thick, so there is 0,4 mm left for elastic material and i went for a go with one layer of butyl rubber, that i had cut out of an old bicycle tube.
It works.
So that was not too much of trial & error. I would not have to utilise the 12x2 mm aluninum tube. I would not have to precision grind me a custom spacer (or axle elongation). However, i had mentioned that i’d come up with a solution so i still produced several aluminum washers for You.
Solution 2 for small protruding length. A custom made spacer is essential

Pic. 6: a few aluminum washer blanks were cut off the 12x2 mm aluminum tube.
Cutting off raw spacers is only te start of the game. That’s the easy part.
However, the principle is to be seen in Pic. 6. The 8 mm aluminum spacers fit into the 12 mm washer so they can elongate the axle of the Strida.
Pic. 7: Workshift tools for precision grinding the spacers
I made an adjustable handle for grinding the spacers of a nice long M 8 mm screw and two nuts so that the setting can be fixed. One nut will not work as it turns like crazy while grinding the spacer on a diamond or conventional whetstone.
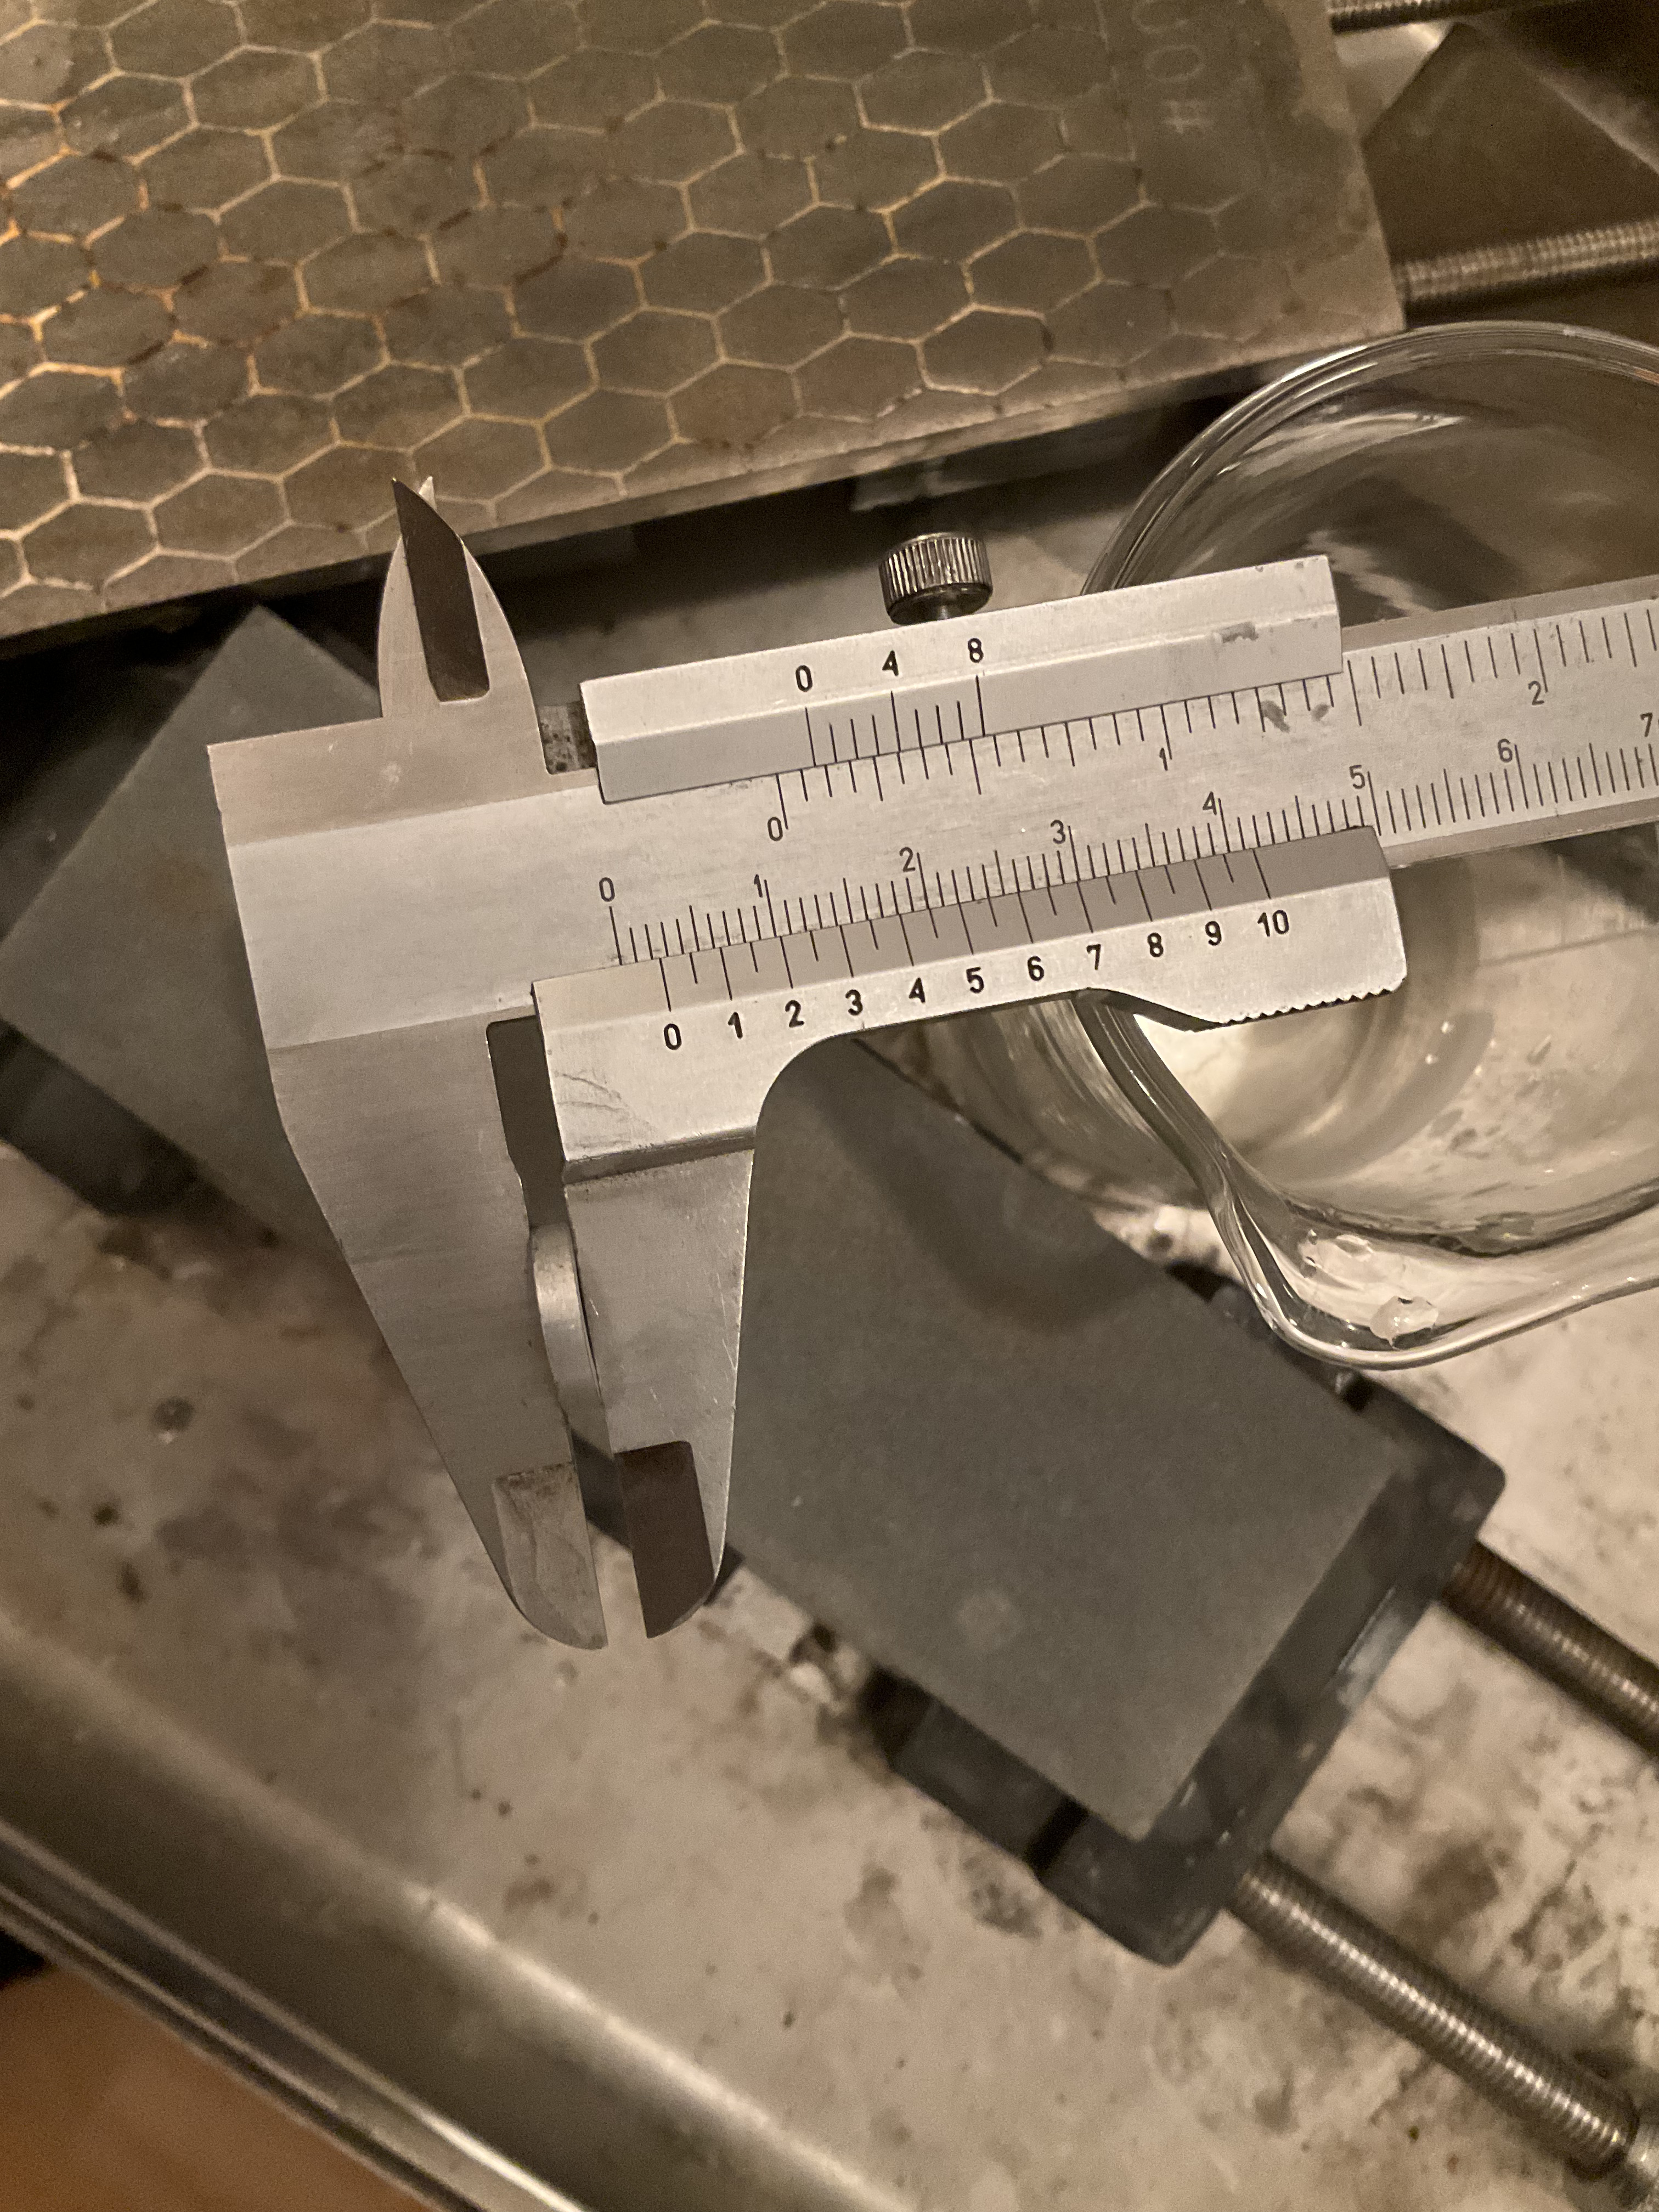
Pic. 8: An adjustable calliper is essential
Using an adjustable calliper is essential. 2 tenth of a mm can be seen if You look through the calliper and washer. Then, the final adjustments, You can feel the high and low spots in the calliper. The high spots tend to get stuck where the low spots tend to move so You can identify the spots where to give it a bit of a grind on the whetstone.
For the final precision, the structured diamond plates that i own give too nervous a feeling while grinding. I had to change to the wetstone, but that worked very well.
I produed one 2,5 mm thick 8 mm spacer and one 1 mm thick 8 mm spacer.
1 mm is very thin given the simple tools i made to help me out. The 2,5 mm washer was not half the work as compared to the 1 mm washer just because the handling gets more difficult if it gets too thin.
You don’t want to use a fast running grinding machine as the small washers tend to fly away to nowhere before You even notice. Diamond plates for the fast coarse work are helpful but not necessary. A standard whetstone for grinding is all You need (not a sharpening stone. Sharpening a knife is somewhere around 1/10 of a μm where we are talking about a 1/10 of a mm here).
So, if You don’t find a combination of elastic materials and washers that suits Your production Strida, find a combination that fits unter Your axle with at least 1 mm of elongation. You are free to custom design Your elongation to any precision.
regards: Klaus