as of the day before Yesterday i have two Stridas, an 18" one and a 16" one.
I brought down the bottom brackets on both of them.
The 18" SX has a aluminum bottom bracket housing and the 16" LT has a plastic bottom bracket housing. It makes a differnce.
It’s not worth mentioning much how to do it with the aluminum bottom sprocket of the SX:
Loosen the ring screw using a 60mm or compatible hook wrench (i got me an adjustable 60 - 90 mm hook wrench).
Remove the bolt that might hold the kick stand or otherwise just arrests the bottom bracket.
Rotate Your bottom bracket until the crankshaft axle is in the lower position.
Arrest and tighten the according screws and that should be it.
It’s not so easy with the older bottom bracket with a plastic housing.
I didn’t need the …
… to remove the plastic housing of the bottom bracket, but i removed the crank shafts on both sides and supported the frame wit a peace of hard wood while i hammered out the bottom bracket using a hammer and a peace of soft wood.
It seems, quite many plastic bottom brackets are that tight, that it is difficult to adjust the belt tension.
My solution was to carefully deburr the housing of the bottom bracket (the aluminum part welded to the frame) and even some 10 minutes of sanding the housing by hand made much of a difference. Carefully i proceeded like that and checked the tolerance between bottom bracket and housing every now and then.
Nor where the aluminum bottom sprocket comes with two M8 threads, the plasic bottom spracket has no such thing as a second thread, You could use to adust the belt tension.
I solved this as follows:
I do have an angle grinder and these usually come with an end hole wrench for removing and arresting new discs.
Mine is 30 mm with 4,7 mm bolts.
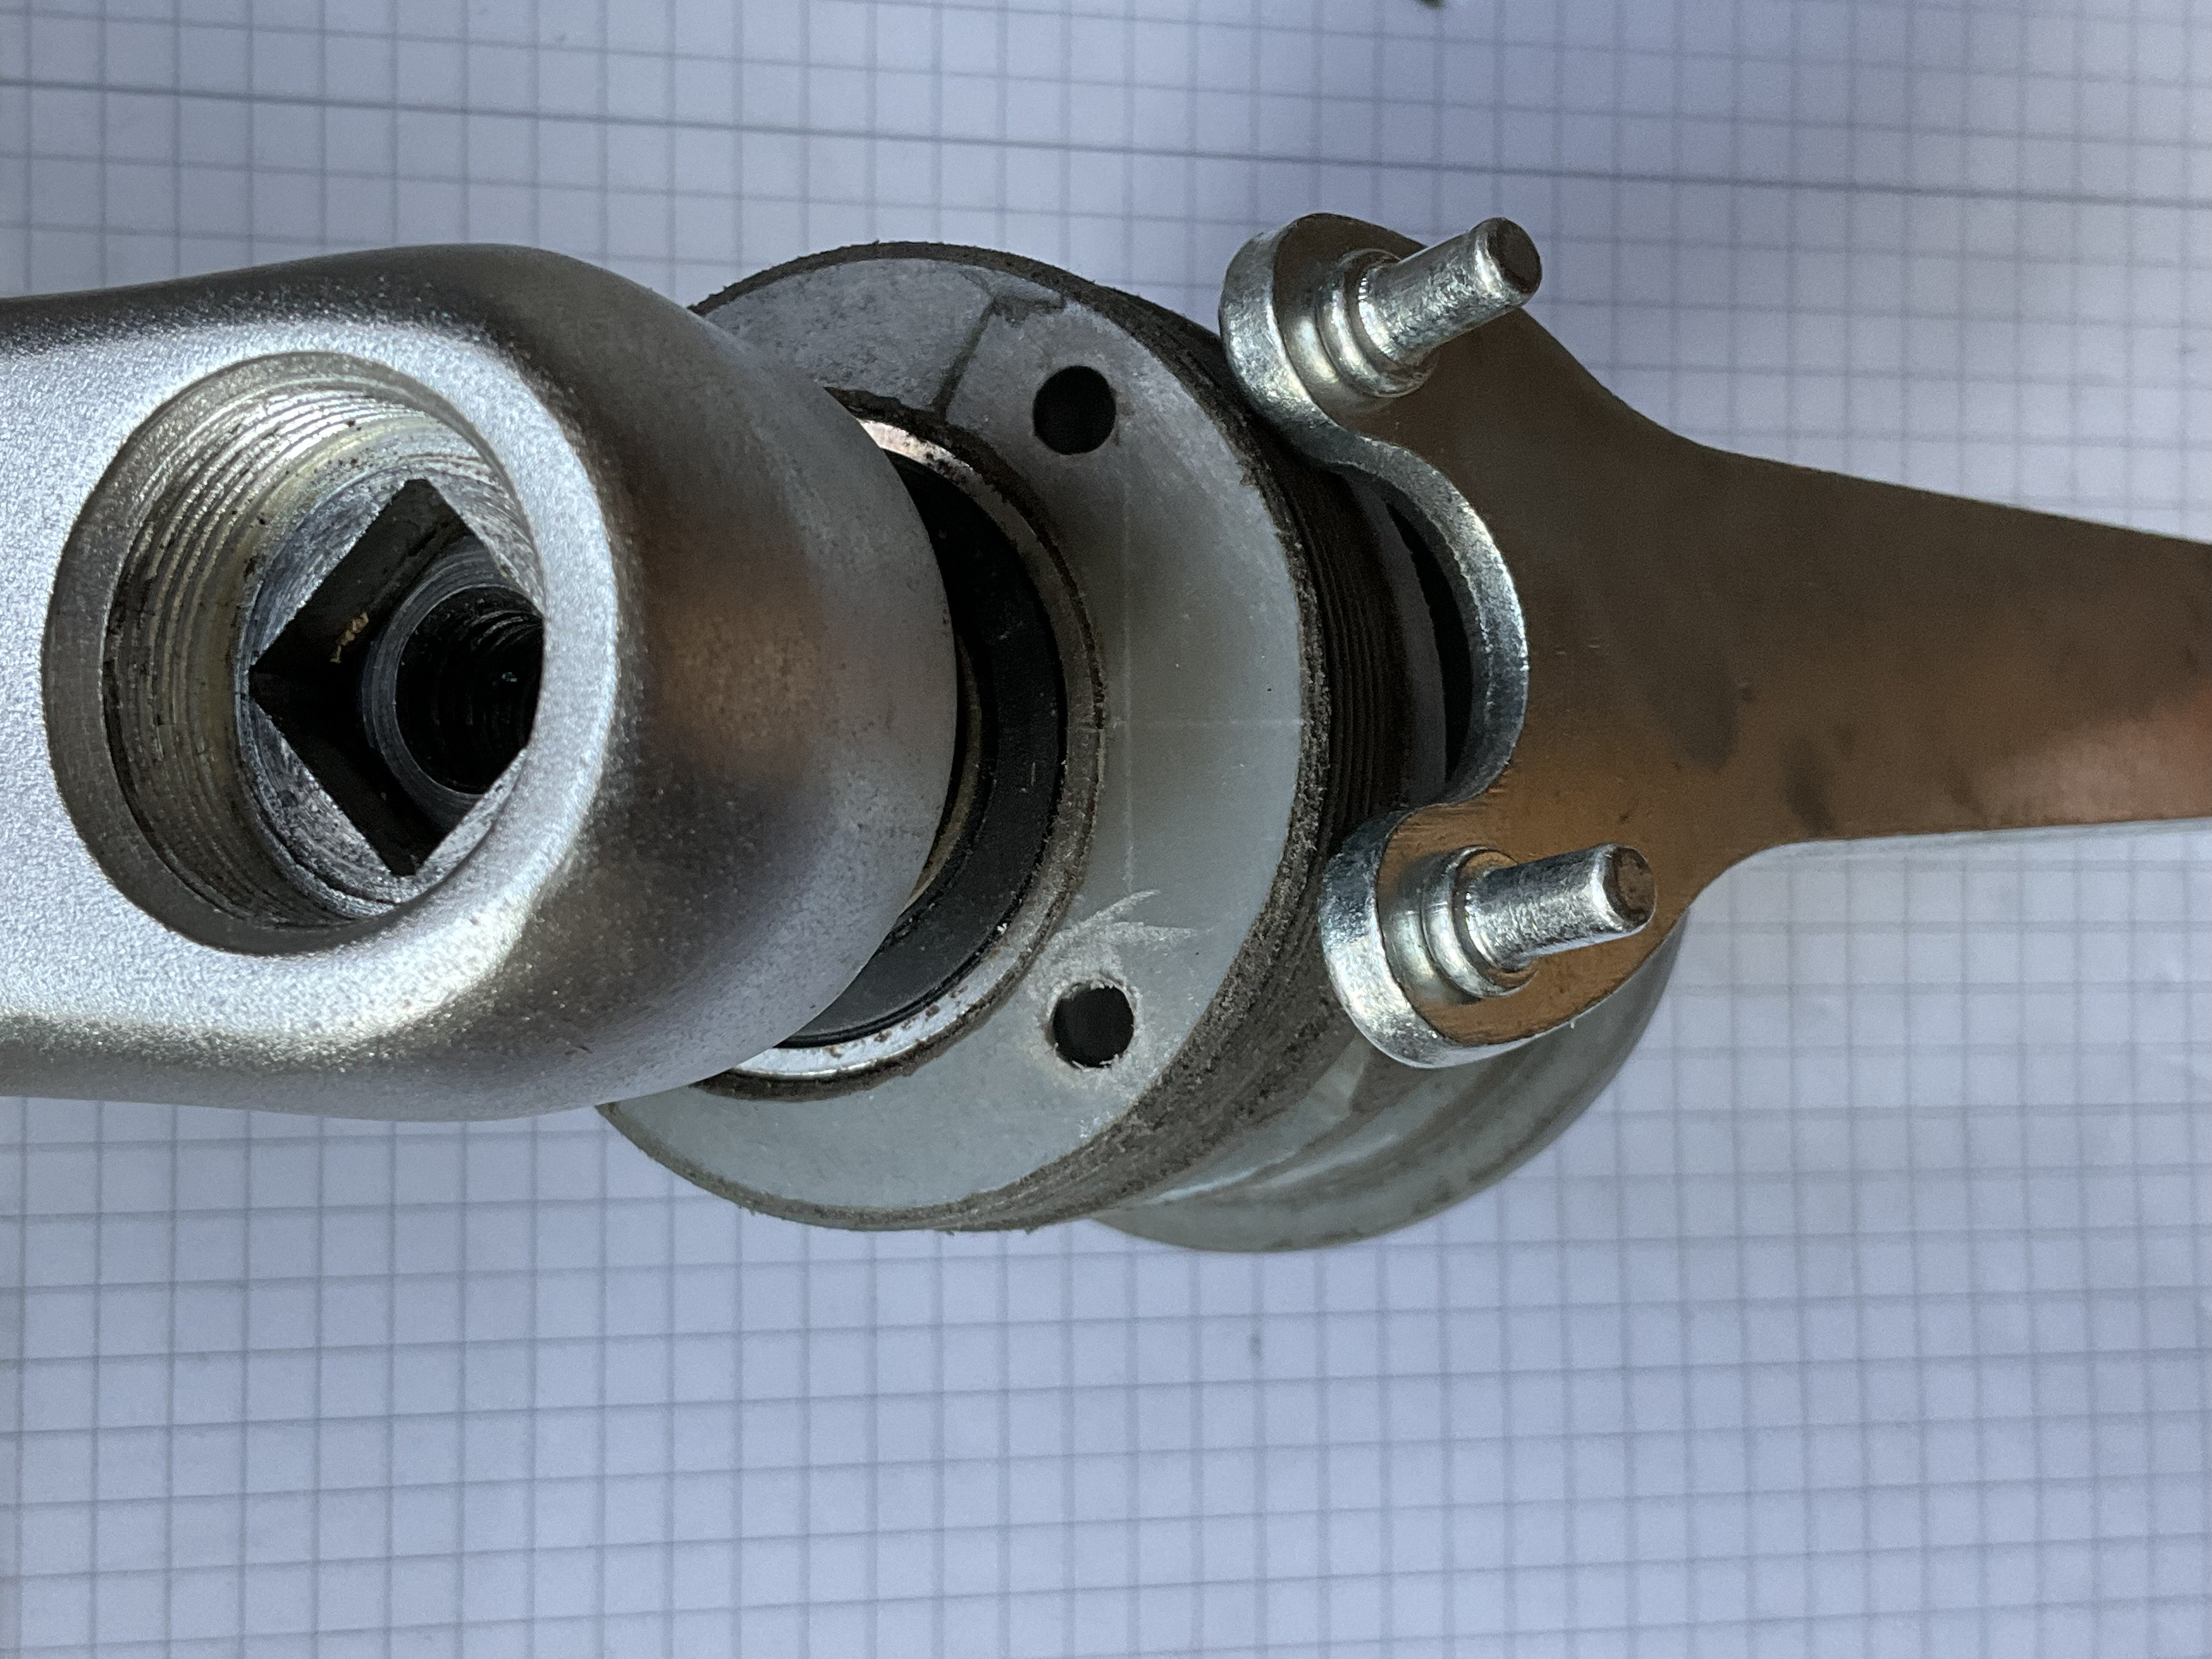
Now i drilled two holes to the plastic bottom bracket like shown here:
Pic 1: two holes compatible to an end hole wrench make for a precision adjustment of the belt
You need to be careful so You position the holes accurately to match Your end hole wrench.
But You might also want to be able and adjust the belt tension without having to remove the left crank arm.
It’s a matter of a few 1/10th of a mm to really make it work well.
However, here’s how it looks like on the Strida LT:
Pic 2: End hole wrench and hook wrench engaged to easily fine tune the belt tension
It works like a charm!
In fact, i consider to drill the exact same two holes into my aluminum bottom bracket, too. Belt tension is no longer an issue with this solution, if done properly.
Why bother at all?
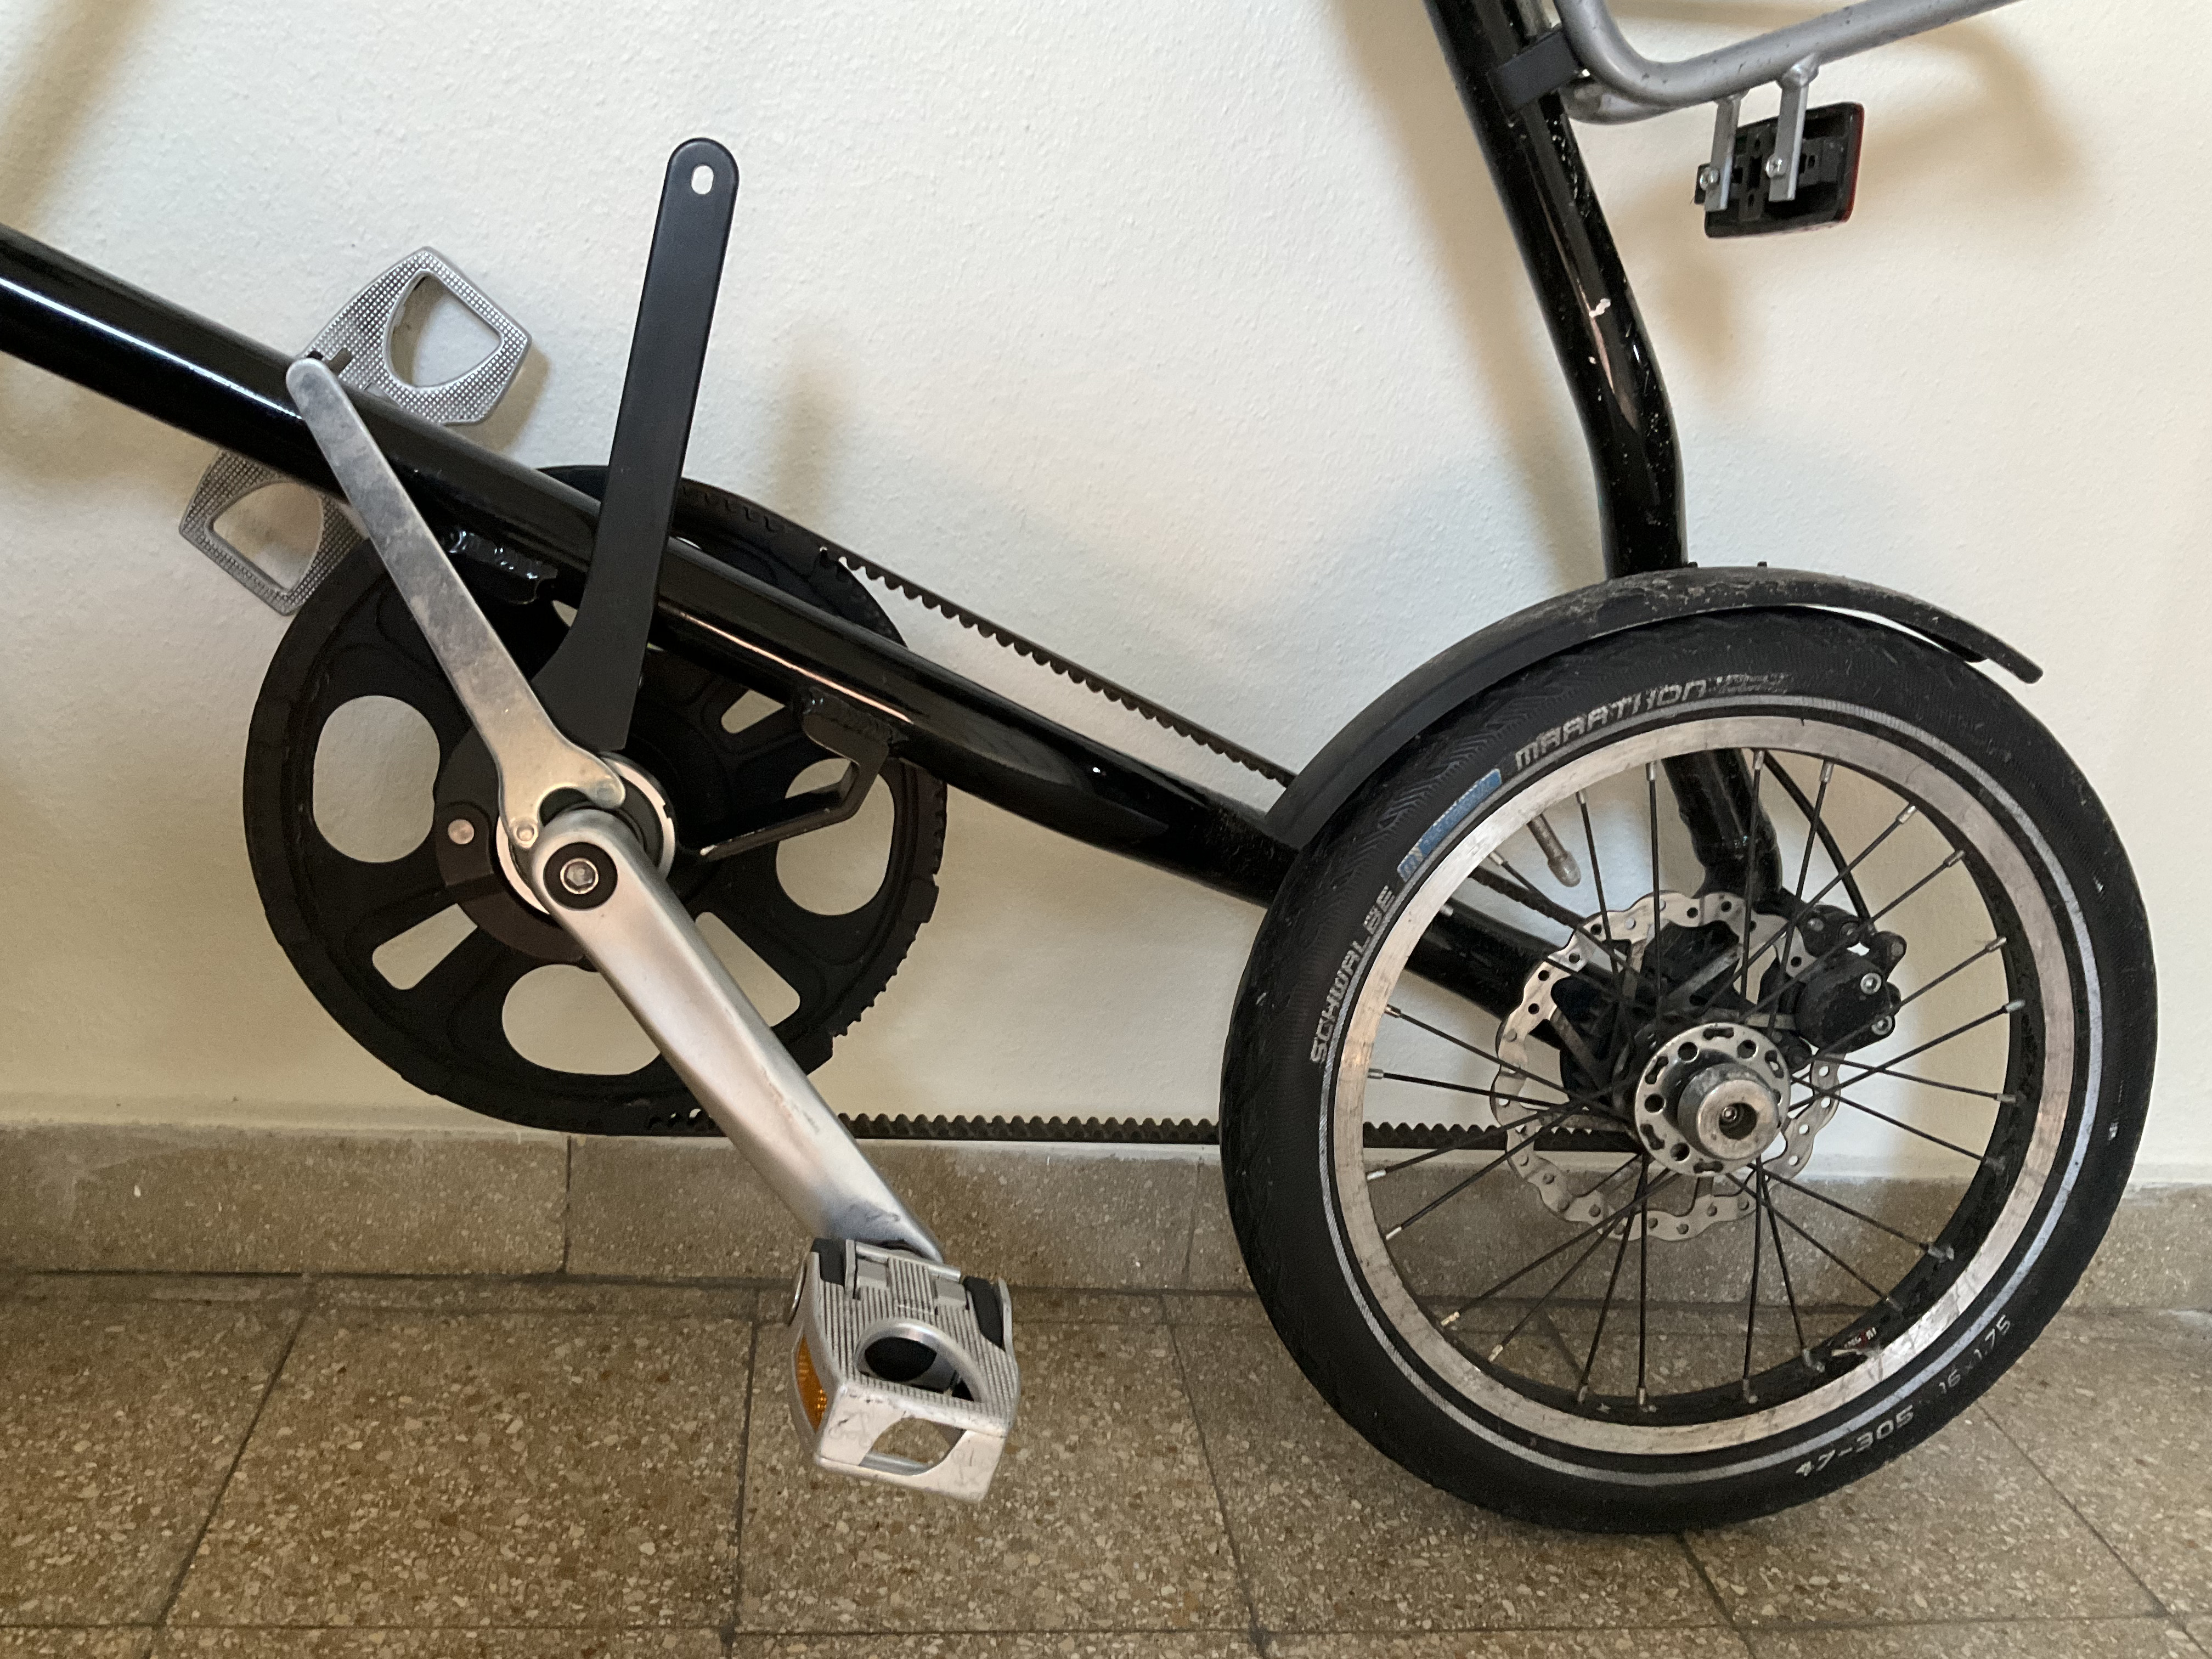
The Stridas have a fairly high bottom bracket that makes for bended knees while riding. On the other hand, even with the crank shaft in the bottom position, there is more than enough clearance between the pedals and the pavement.
It just improves the geometry of the bike. It gives some extra clearance between Your knees and Your handlebars.
Strongly recommended to every Strida user.
What You see after the modification is the following:
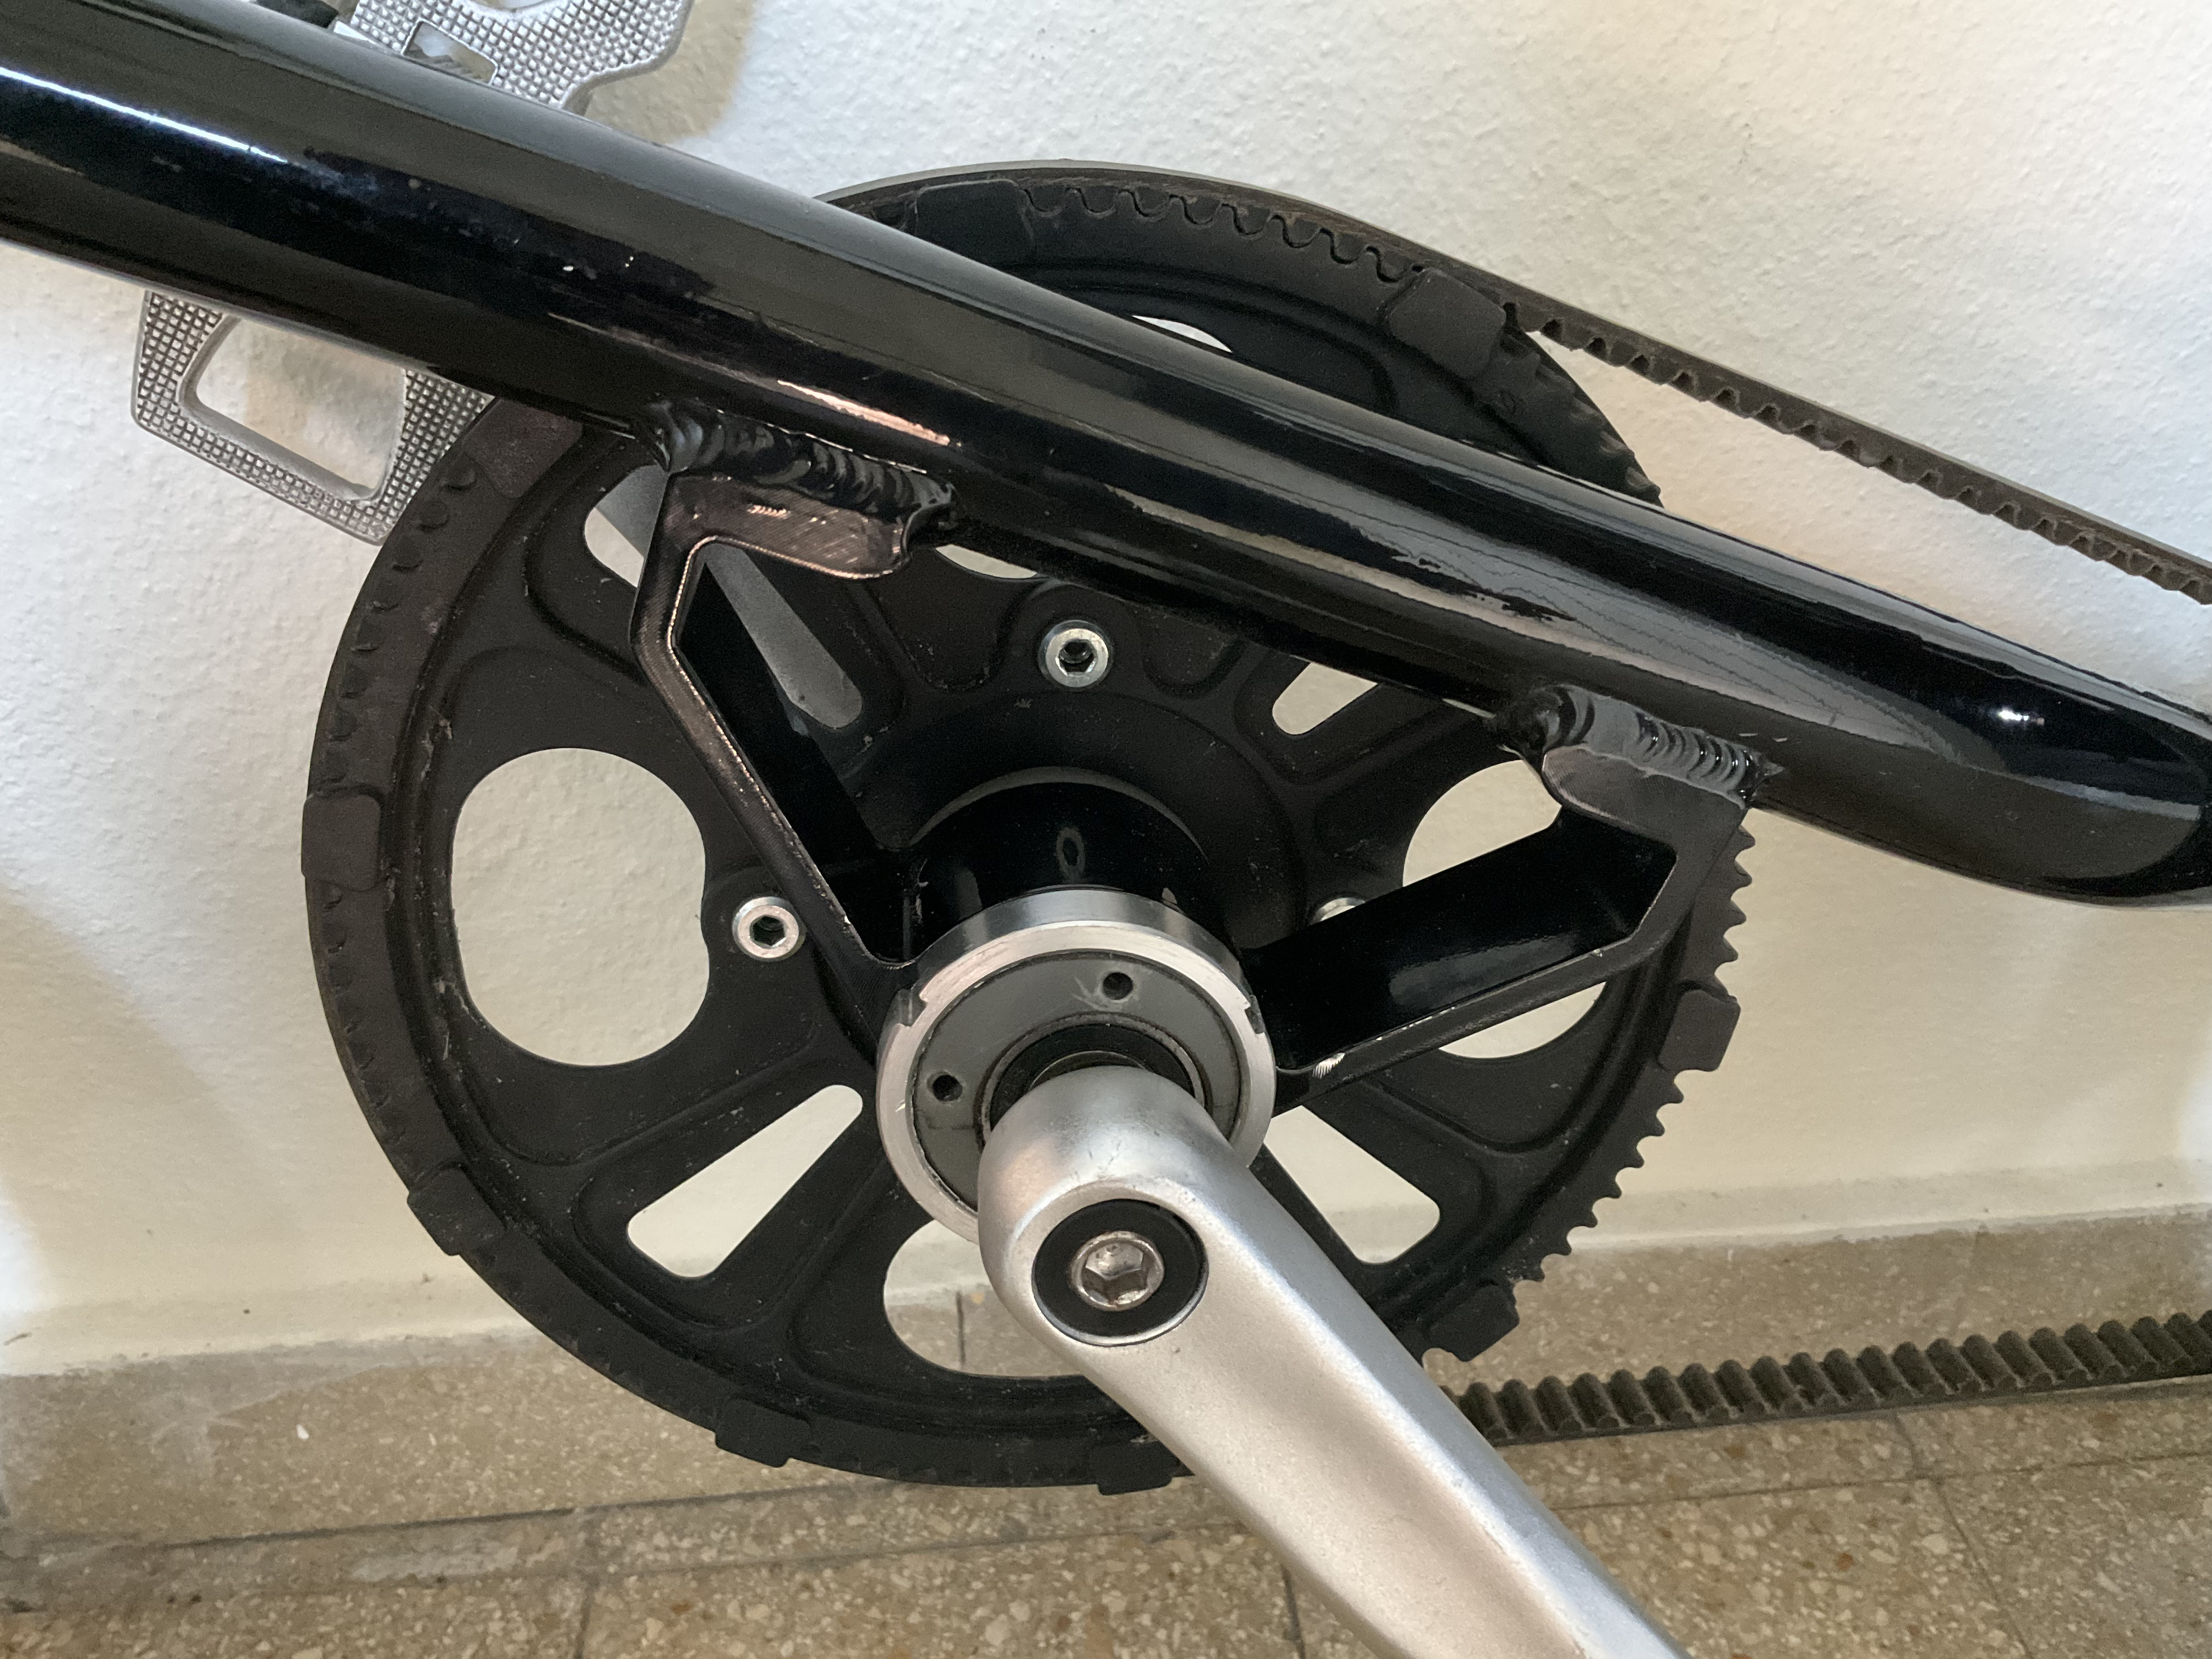
Pic 1: precision belt tensioning with the aluminum bottom bracket
The difference is: Where i sought to get the holes as tight a fit as possible in the plastic bottom bracket, i sought for a minimum of tolerance in the aluminum bottom bracket. Where there are 4,7 mm holes in the plastic there are 5,0 mm holes in the aluninum. You feel a minor slack due to this.
Hi Klaus,
bringing the bottom bracket to a lower position seems a very cool idea to me, as even with the seat post at the highest possible position I’m still not able to fully stretch my legs, so I eagerly decided to follow your instruction.
But having the bottom bracket loosened and ready to turn it upside-down I realised that in consequence the threaded whole which houses kick-stand’s screw will also move to the oposite site, so it won’t be possible to arrest the bottom bracket in position. Could you please explain how you’ve approached that? (Please excuse my ‘tech-impairment’ if I’m missing something;)
Many thanks, cheers!
Michal
plastic bottom bracket?
In my older 16" with the plastic bottom bracket, i had more of a problem to move it at all. It’s a thight fit. There is no screw to hold a kick stand so the nut on the bottom bracket must do the job. Here’s why i decided to drill 2 holes into the bottom bracket like shown above.
aluninum botton bracket?
In my newer 18" with the aluminum bottom bracket there is a second hole with an M8 thread that comes in position to hold the kick stand if You like. Here’s where i decided to make the kick stand adjustable as shown earlier.
However, i don’t use the kick stand .
You’ll need a shorter screw to fit the new situation because the axle of the borrom bracket comes down. It’s 5mm less length that You need to have in the srew.
The same is true, if You go without kick stand: bottom bracket up is 5 mm less length for the bolt.
My bolts are:
production: kick stand: 40 mm
production: no kick stand 35mm
bottom bracket down: kick stand: 25 mm
bottom bracket down: no kick stand: 20 mm
Dear KWie,
thank you for your help & detailed explanation. Mission completed. I am on a fairly recent edition of LT and here the plastic bottom bracket suprisingly does not suffer from being stuck in its housing - it did not require much effort (with a few drops of WD40;) to move it. However, I had to apply your drilling procedure to achieve a firm grip to fully turn it upside down. Then I indeed discovered a second threaded hole to accomodate the kick stand’s screw
Being afraid of having to fight the plastic bottom bracket issue with smooth rotability and resulting difficulties in proper belt tension regulation, I had already ordered an alloy bottom bracket - so now have a spare and may replace the current one anyway.
Thanks again, your experience saved me some good amount of frustration
Thank You!
Well, sharing is caring but be confirmed, that a thank You every now and then really motivates the extra work it means to do it not only for Yourself but document it and share it with the commiunity.