Hi,
There are two reasons why You might want to modify (or remove) Your kick stand on a Strida.
1st) Change of tyre size - especially on an 18" Strida.
2nd) You brought Your bottom sprocket down to get some more clearance between Your knees and Your handlebars.

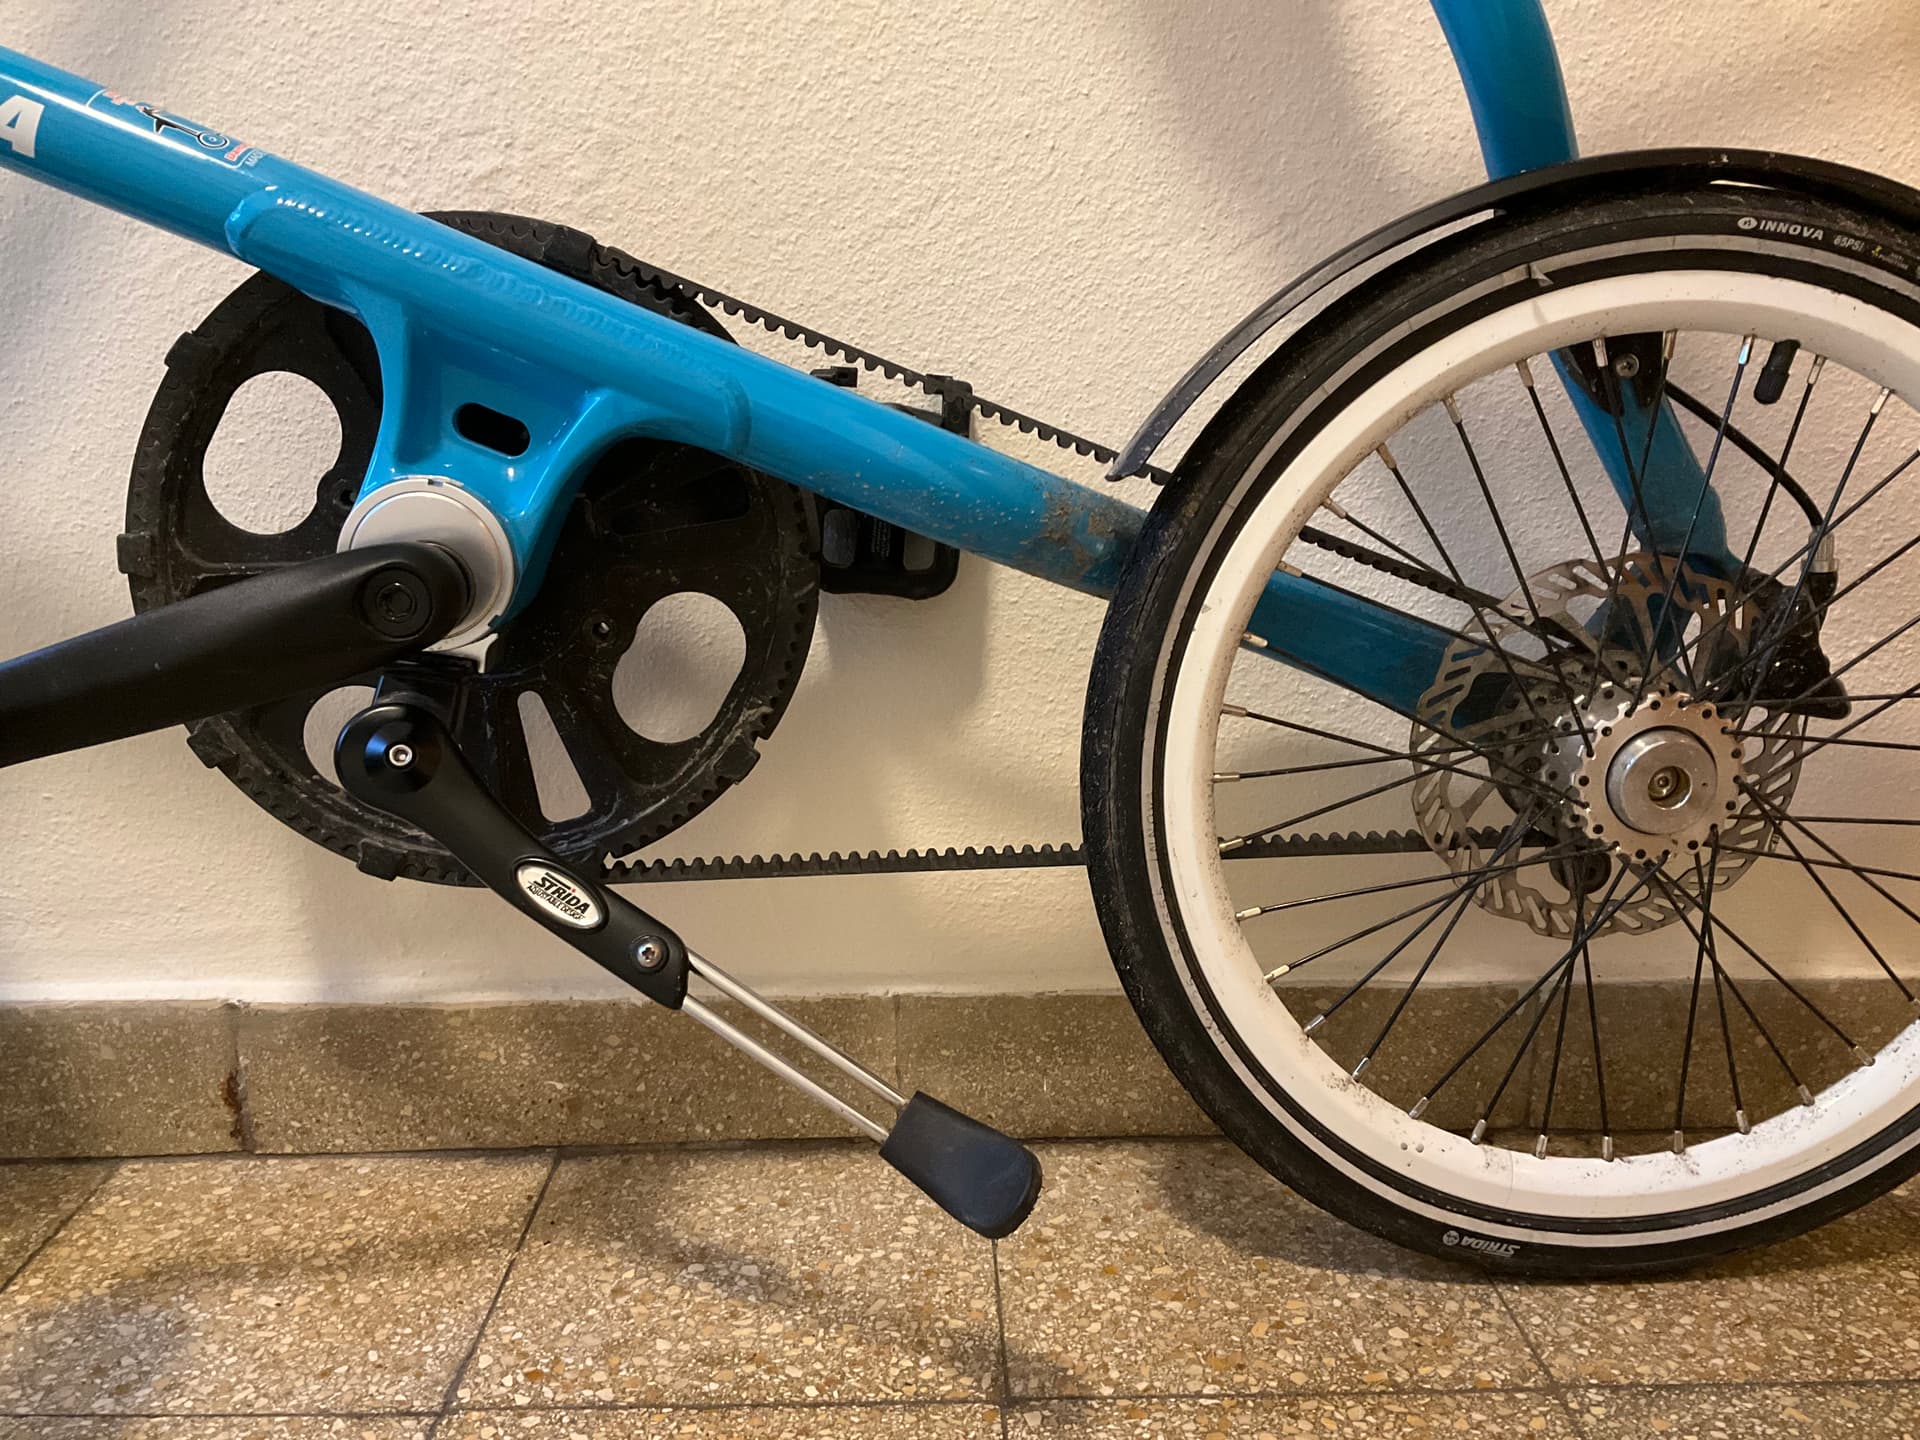
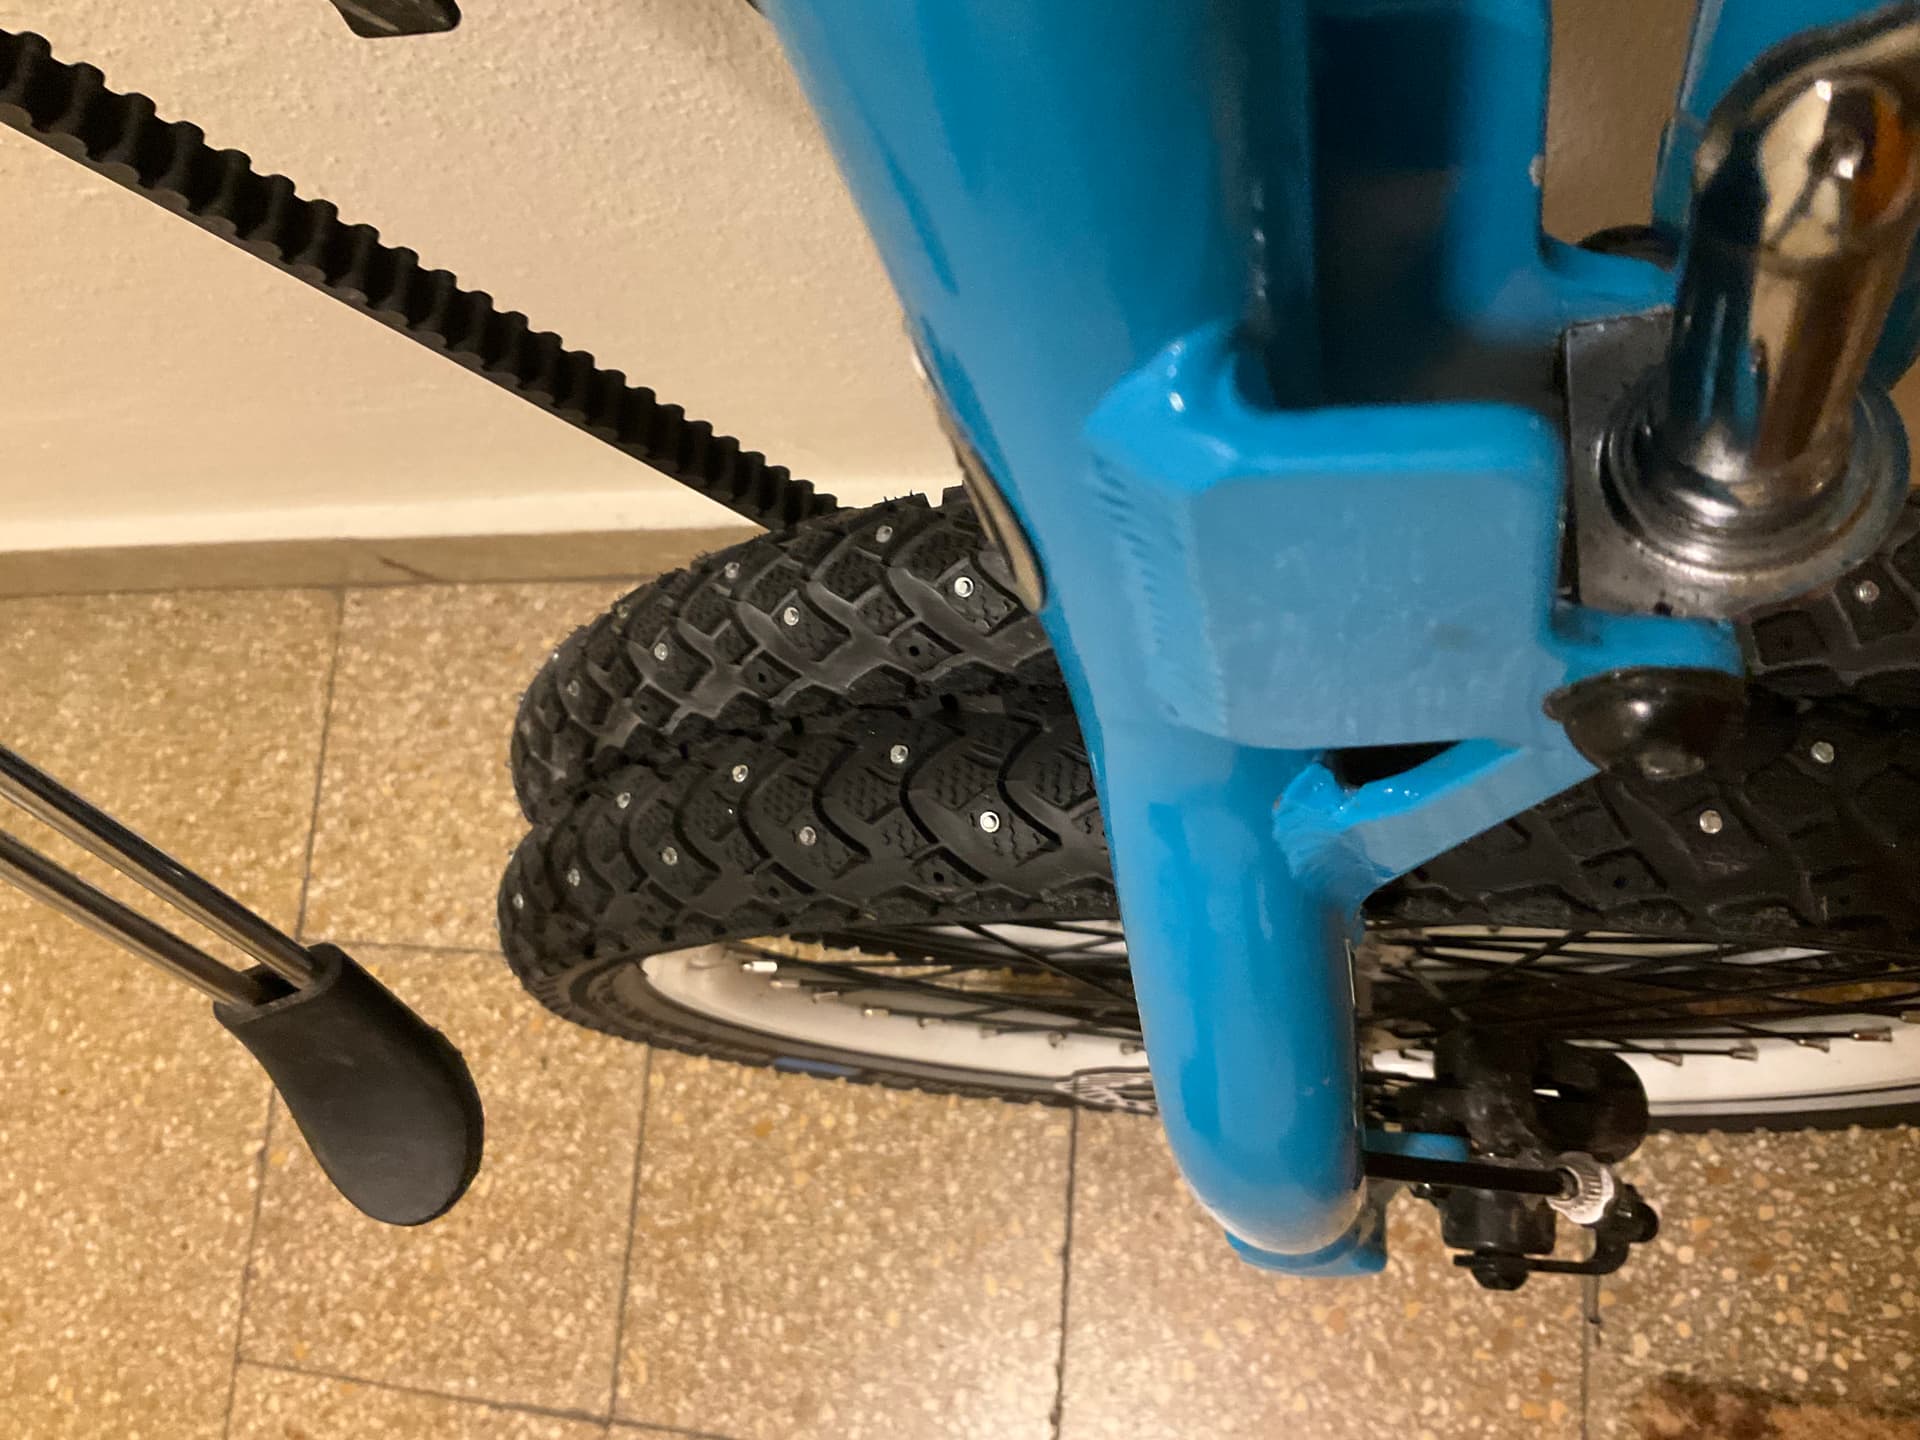
Pic 1 showes my Strida SX and You see that i brought my bottom sprocket down.
It changes the position of the kick stand as compared where it was with the bottom sprocket in the upper position.
No deal on a 16" Strida? But it surely does matter with an 18" Strida. I find my front (steering) tube cought between the kick stand if i move it to the front and the seat post if i move it to the back. As i can’t do much about the seat post, the kick stand has to go out of the way.
There are only two ways of dealing with it:
a) Get rid of the kick stand (and save Yourself 265 gramms of weight of Your Strida)
b) Modify Your kick stand to make it get out of the way of the steering tube.
You can always get rid of the kick stand and i probavly might do just that. But here, i like to show a way of dealing it with the kick stand mounted to the Strida.
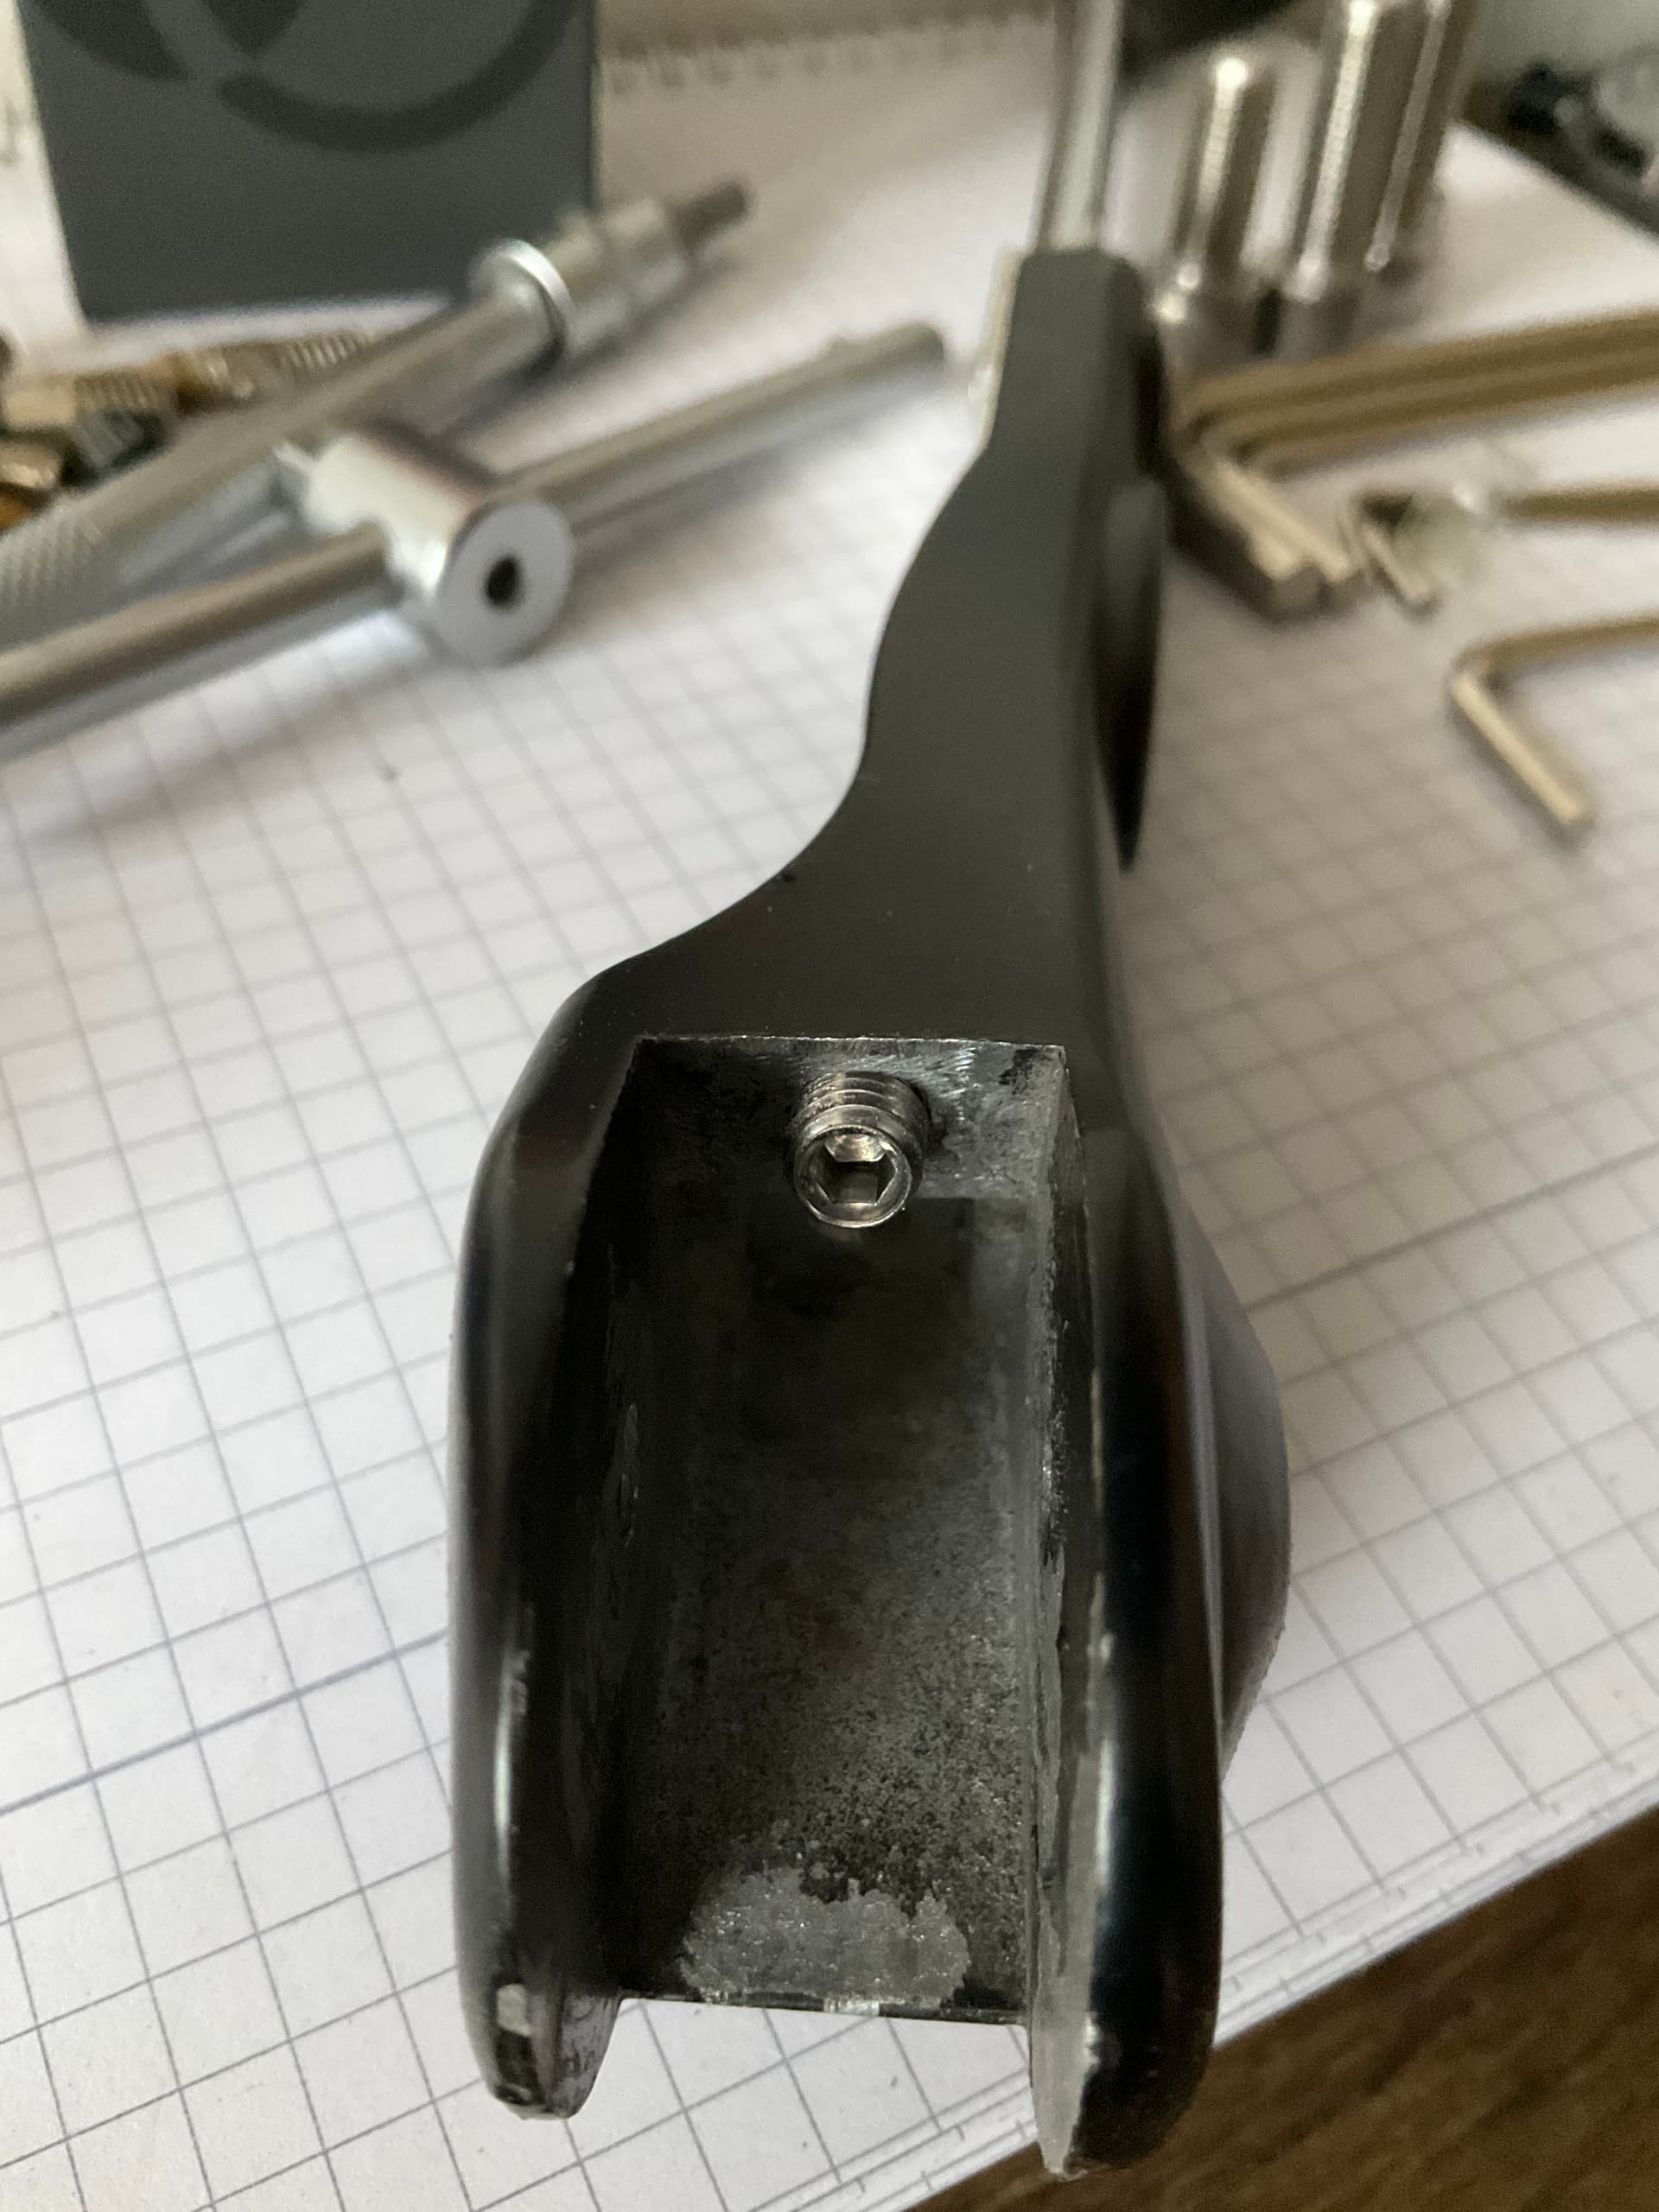
Pic 2 shows a complete other position of the kick stand as compared to pic 1.
Here, i have engaged my adjustable stopper to the extent that there is barely a gap between the kick stand and the pedals. So this is the geometric limiit for the kick stand in practical use.
How did i do it?
First i thought i’d drill a hole and cut a thread into the fixed part of the kick stand. The part that is connected to the frame. But when i dissassembled the kick stand i found out, that the spring mechanism is located in this fixed part.
I had to change plans and mount an adjustable stopper to the moving part of the kick stand.
This made things a bit more tricky. I had to use all degrees of freedom of my table drill. I had to tilt the head both horizontally and vertically and i even had to tilt the table of my drill. I wonder how many people are equipped to do that.
However, here’s how i did it:
First i center punched the hole i was to drill for a M6x10mm ISO 4029 adjustment screw.
Then i drilled about 1 m deep to a diameter of 4 mm perpendicular to the surface of the kick stand to make the final drill catch in the final tilted geometry.
Then i carefully adjusted head tilt, table tilt and all kind of geometric options of my drill to make the 5 mm drill catch and go the intended direction.
After that t was easy to cut an M6 thread into that hole.
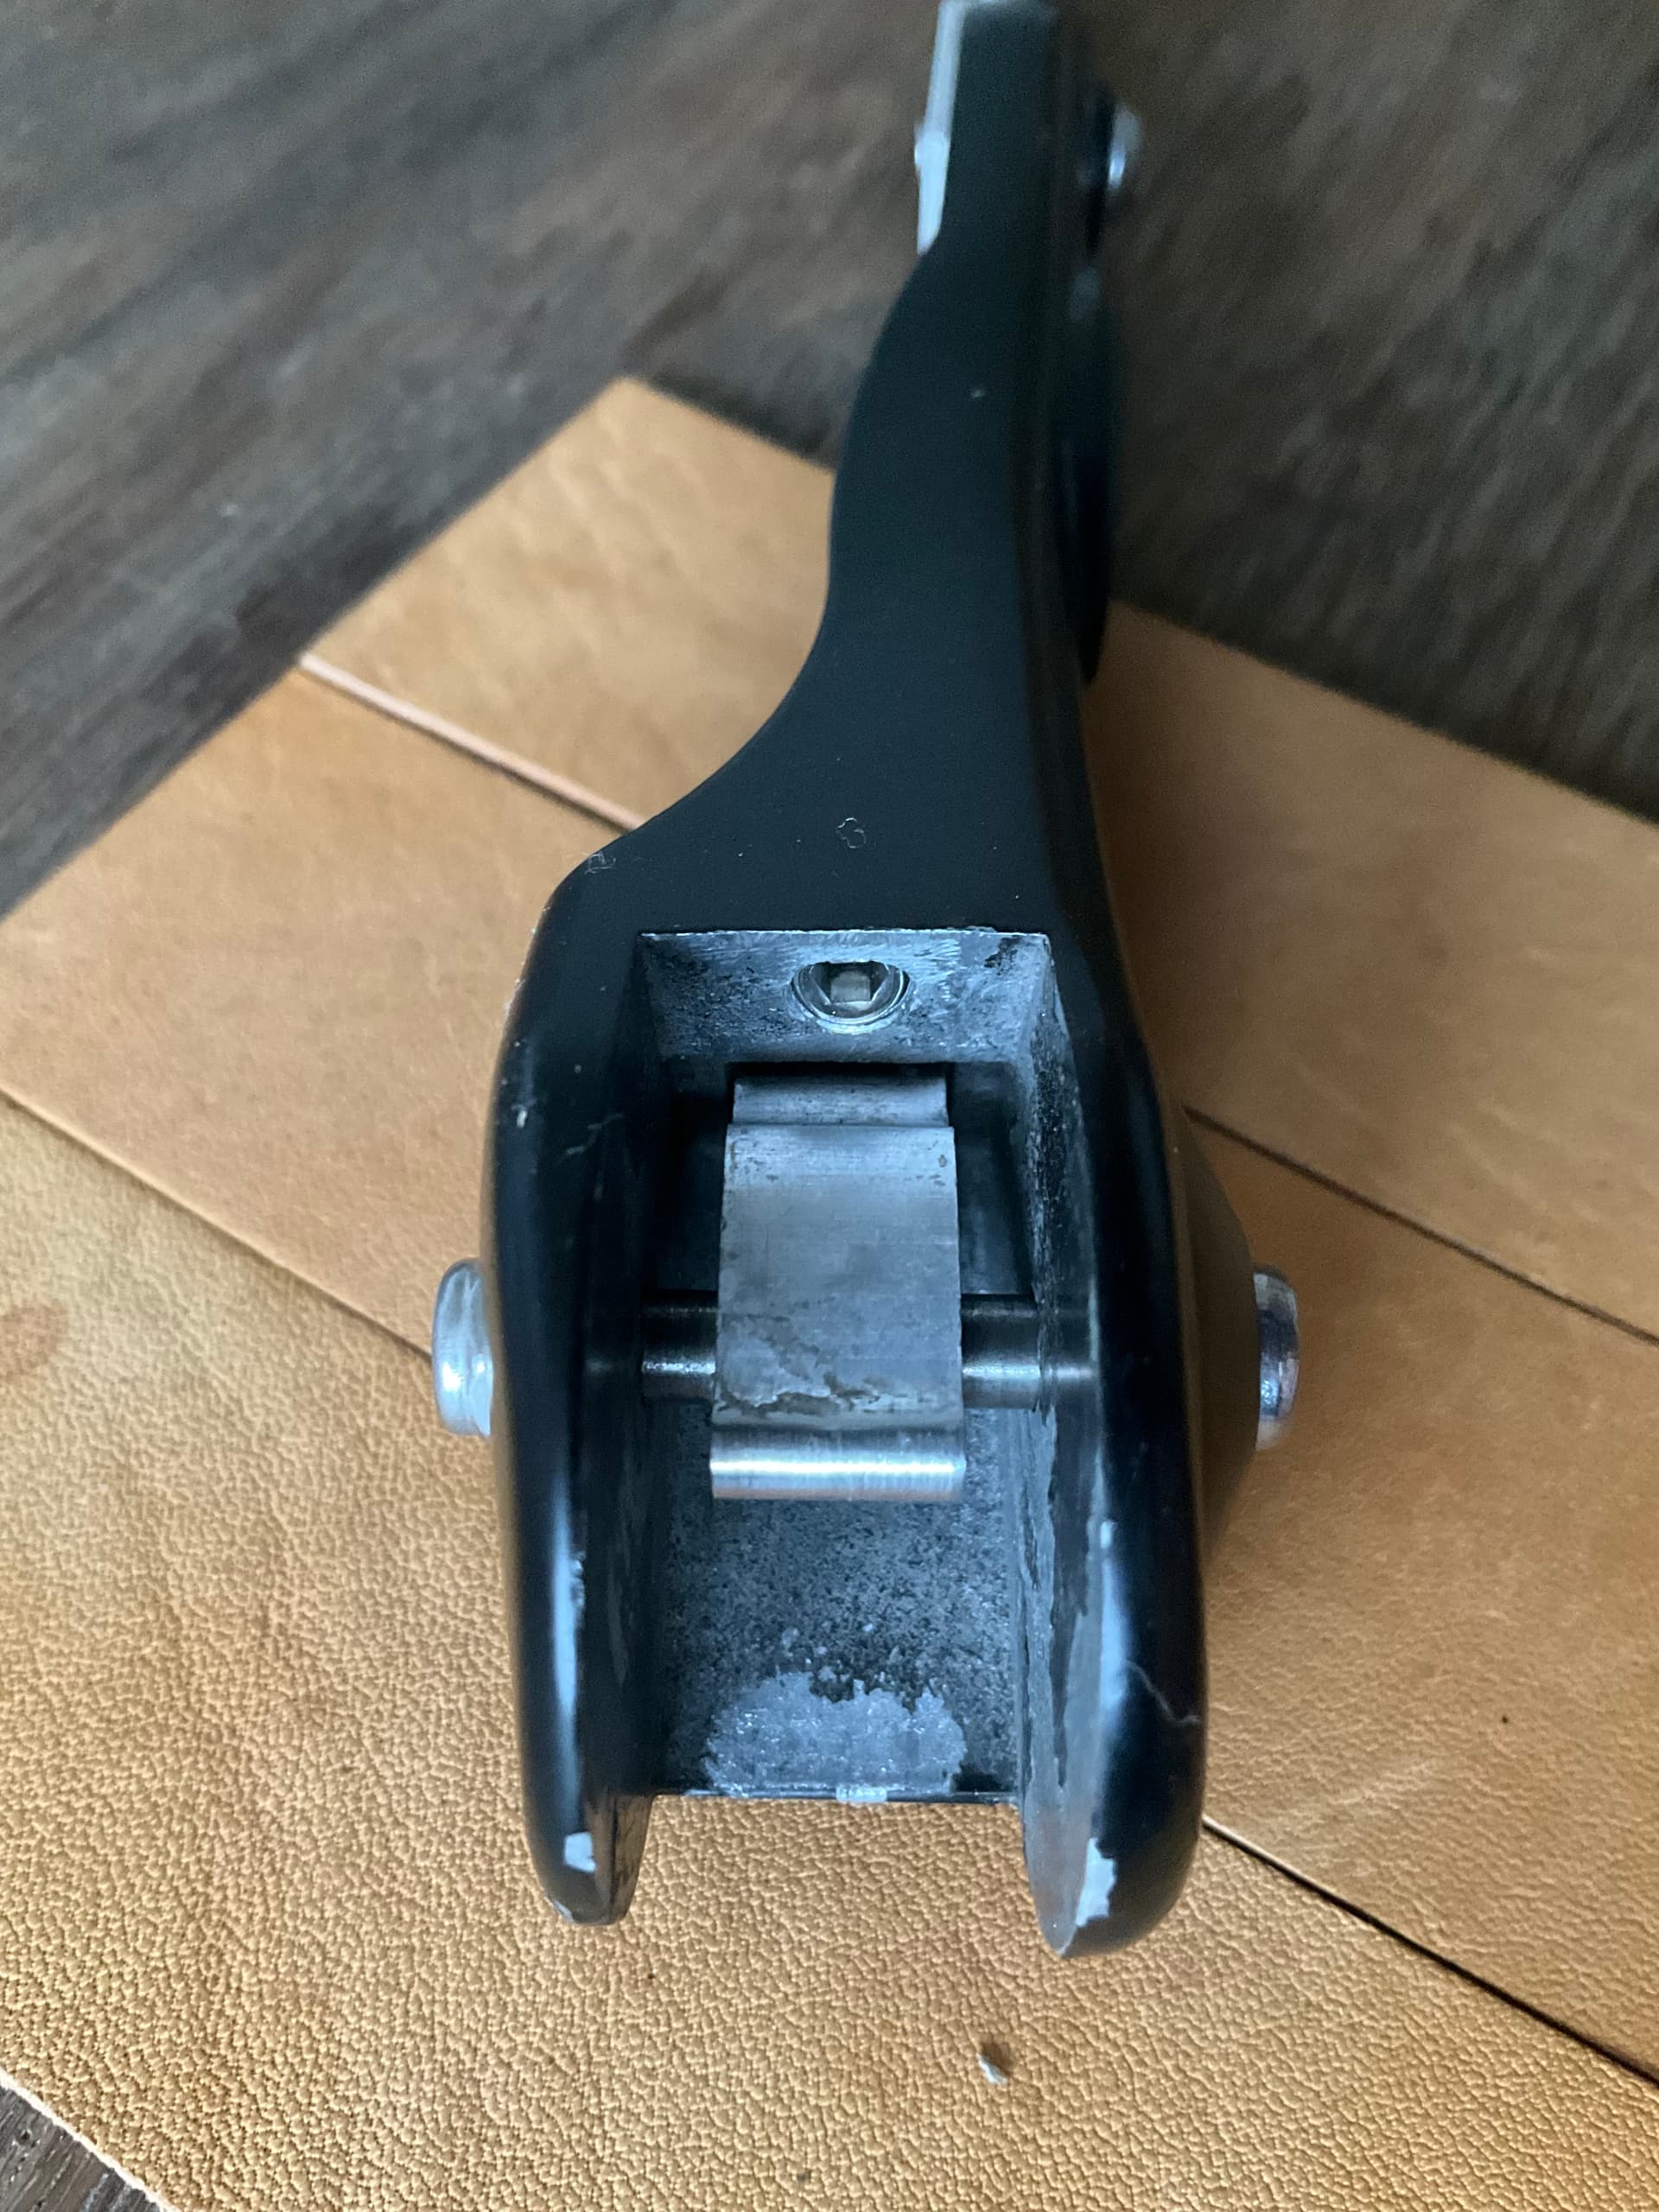
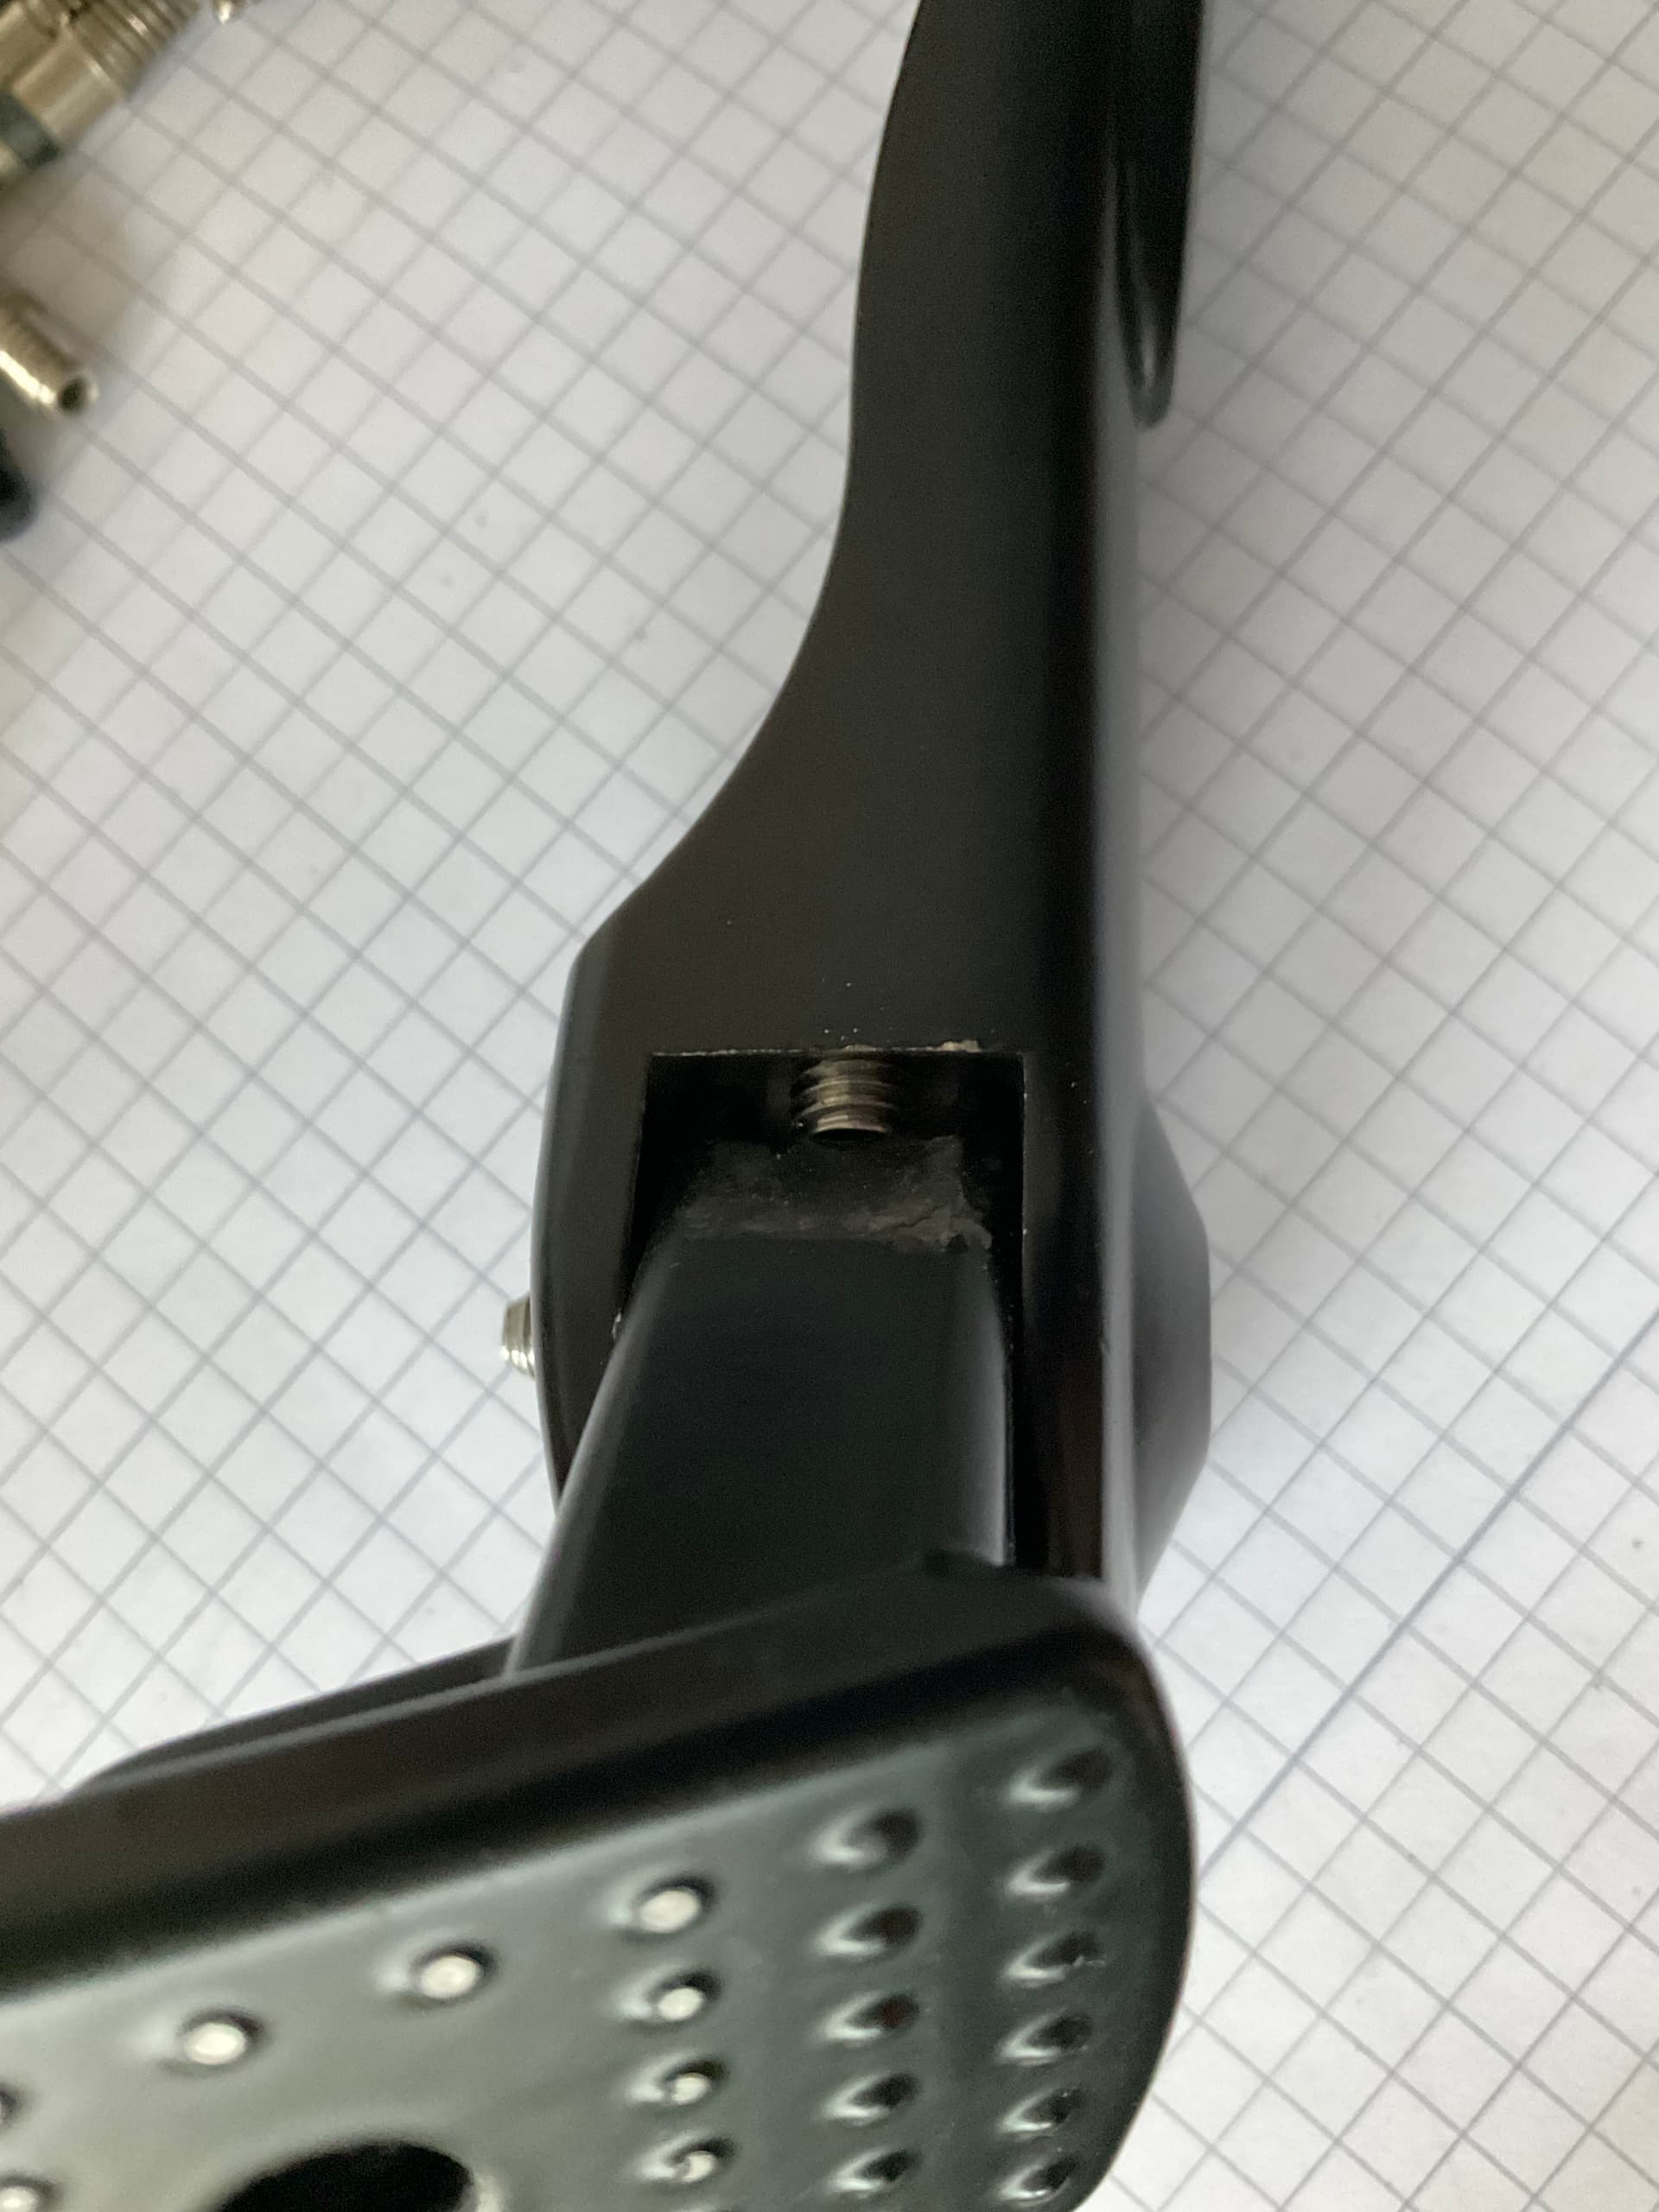
Here’s the results:
Pic 3: Adjustment screw engaged
Pic 4: adjustment screw disengaged
The effect was already visible in Pic 1 and 2 but these are the details.
Pic 5: The modification is practically invisible. You have to know it.
Pic 6: I can now fine tune the position of my disengaged kick stand so that i have a sufficient clearance between pedals and kick stand and a sufficient clearance between front tube and the rest of the bike while folding and unfolding.
These are 42-355 Schwalbe winter tyres with spikes. Due to their sturdy profile, they are even wider than 44-355 Schwalbe Marathon. They will not fit into the Strida frame without a wheel modification (loosen the spokes on the frame side and tighten the spokes on the opposite side to move the rim some 3 mm away from the frame) but the adjustable kick stand can deal with them - even with the bottom sprocket in low position.
regards: Klaus