How to „do the Schlumpf“ 2-speed conversion DIY
(Version 2.0 with more details)
Important note: Ming cycle definitely recommends assembling neither the Schlumpf speed drive nor the ATS speed drive yourself. There will be no warranty by Ming cycle!
Personal note: The ATS speed drive is not available as a retrofit kit for Strida. The Schlumpf speed drive kit will be delivered with five years full warranty.
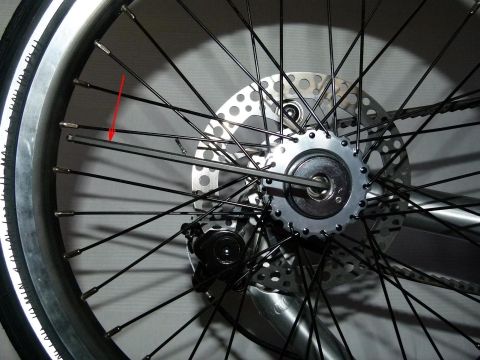
Before doing anything else, please check the wear of the freewheel! It would be senseless to install a two-speed drive together with a worn-out freewheel!
The required tools and detailed information can be found here:
Strida workshop tool guide
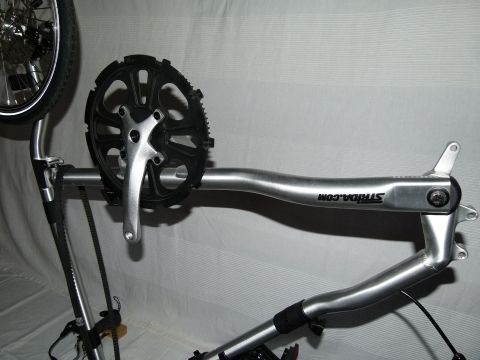
Before starting, mount your Strida into a bike stand, or, if you don’t have a stand, turn your bike upside down. Here’s an example of how that can be done:
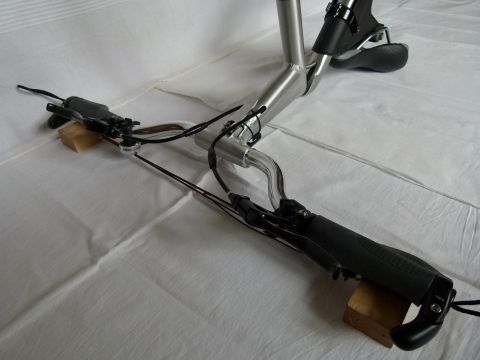
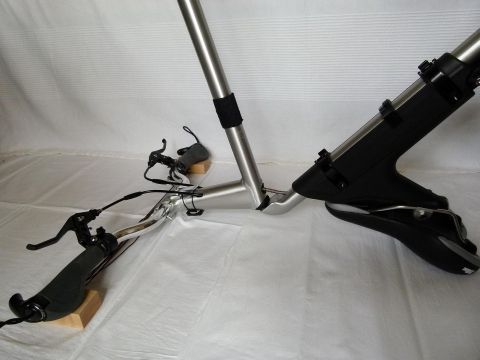
Take two small blocks of wood and put them below the grips. If the saddle is in a lower position than shown in the pics, take some old books or another, bigger block of wood and put it under the saddle. (The cord between the small wooden blocks is helpful to keep the correct distance, but is not implicitly necessary.)
Let’s start 
-
Loosen the big groove nut of the bottom bracket by using a 60 mm hook key
-
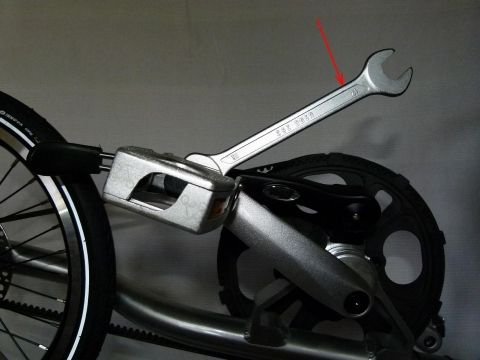
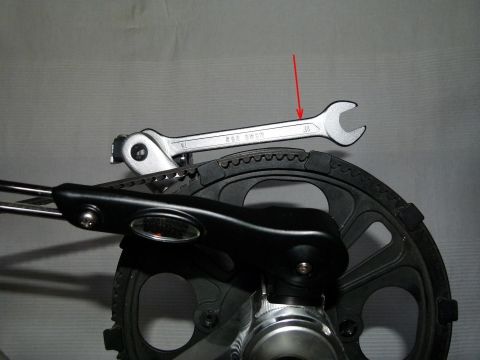
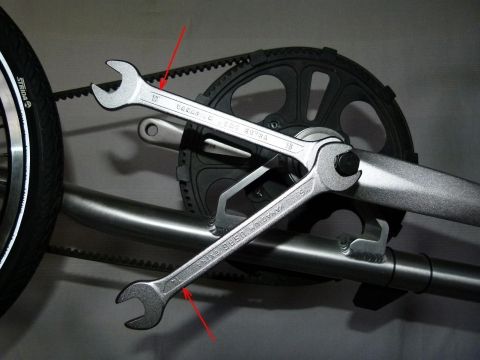
Remove the pedals by turning clockwise (for the left pedal), and turning counterclockwise (the right pedal) with a 15 mm flat wrench (caution: accidentally, a 16 mm wrench is shown here – that’s the wrong size!)
-
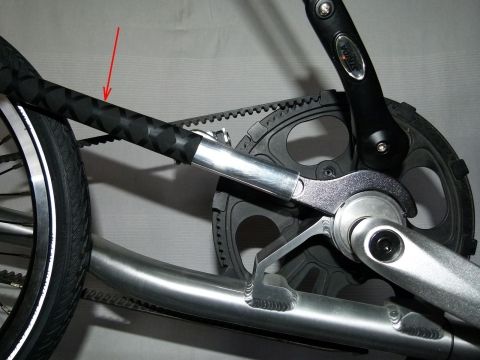
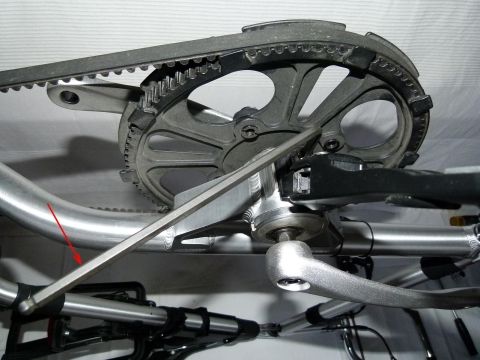
Remove the belt tension bolt (and the kickstand) with a 6 mm Allen key
-
Remove the left crank
a. Remove the crank cover and the crank bolt with a 8 mm Allen key
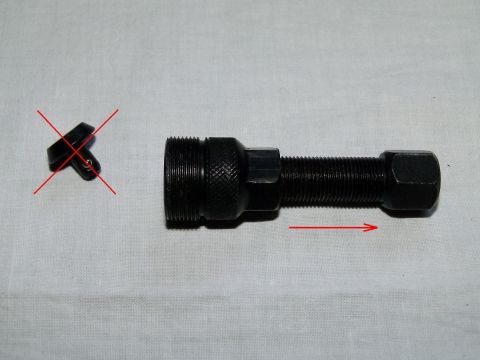
b. Remove the small conical part of the crank extractor tool (depending on the used tool!) and turn the bolt inside the tool out as far as possible
c. Screw the tool, as far as possible, in the crank thread
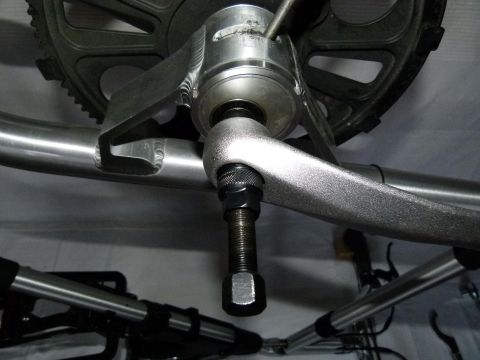
d. Now screw the bolt mentioned in point b) in the tool, the extractor tool should be held with one flat wrench (16 mm), the bolt should be turned with another wrench (15 mm), in brackets are the wrench sizes for the example BBB tool BTL-14
e. The crank will now be extracted from the bottom bracket axle
-
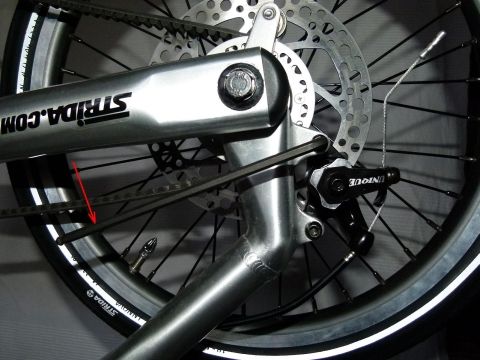
Remove the rear wheel bolt, the metal and the plastic washer, the counterpart of the magnet, the two plastic washers below the magnet’s counterpart and the so-called magnet spacer, part.nr. 338, with a 4 mm Allen key (caution: if the magnet spacer is bent or broken, replace it!)
-
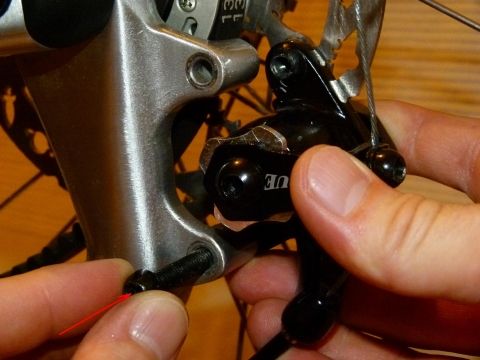
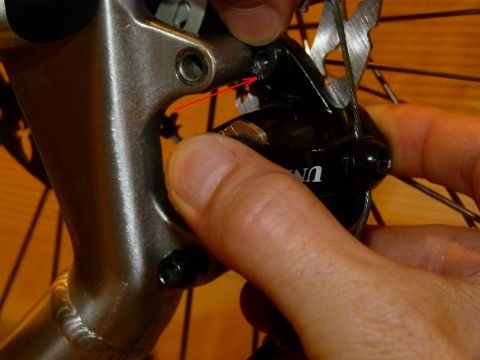
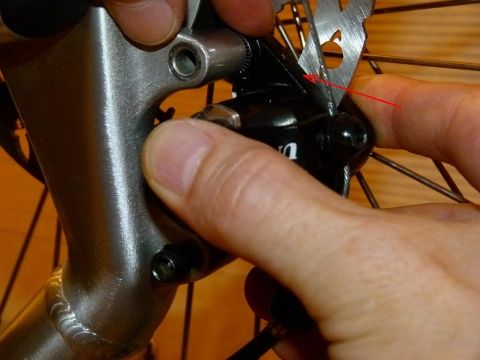
Remove the rear brake caliper by turning the two caliper bolts with a 5 mm Allen key (caution: The two washers, part nr. 7 of drawing 340-04, between caliper and frame might fall down and get lost!)

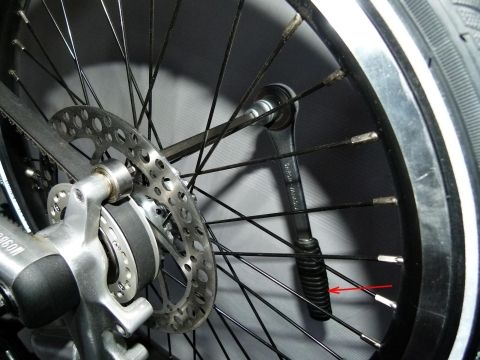
- Remove the snubber bolt, snubber and the corresponding washer by using a 5 mm Allen key (caution: Do not lose the washer!)
-
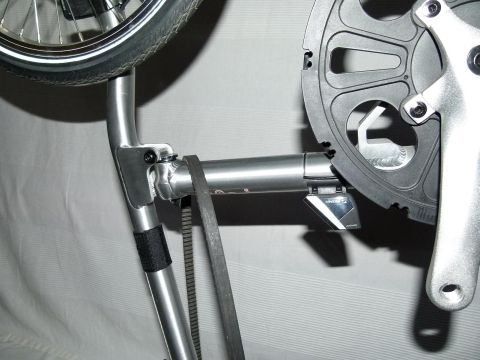
Release belt tension by turning the excentric bottom bracket, usually the bracket should be turned clockwise (seen from the left side) to release, but the bottom bracket can be mounted upside down. If your bottom bracket is mounted that way, it must be turned counterclockwise to release tension.
(Further information is here:
Strida for someone tall
18" Wheel Upgrade: not that easy…
How much play in Strida 5 belt?)
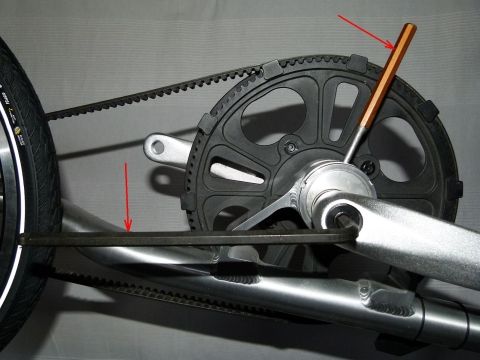
The bottom bracket can be moved easily by inserting a 6 mm drift punch in the tension (kickstand) bolt thread. -
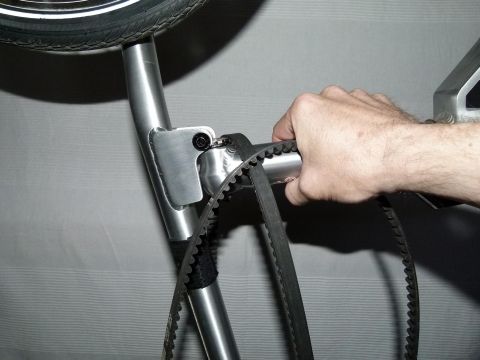
Carefully pulled sideways, while turning the beltwheel, the belt can now be removed from the belt wheel.
-
Now remove the rear wheel, the belt should be pushed near the locking mechanism of the frame
-
Remove the bottom bracket groove nut

-
Pull out the old single-speed bottom bracket from the right side of your Strida
As everything except the belt has been removed now, I suggest to have a break and think about the next steps. It’s time to open the frame to remove the belt, but this is a bit dangerous, the Strida will become unstable. To avoid any damage we should open the frame for a short time only.
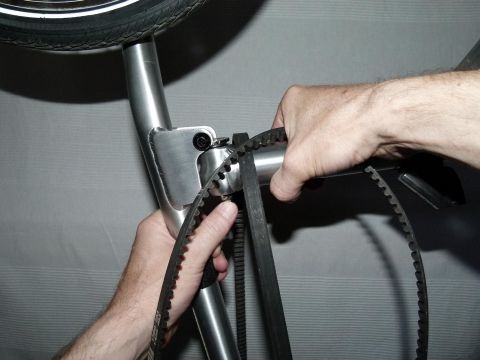
- Changing of the belt:
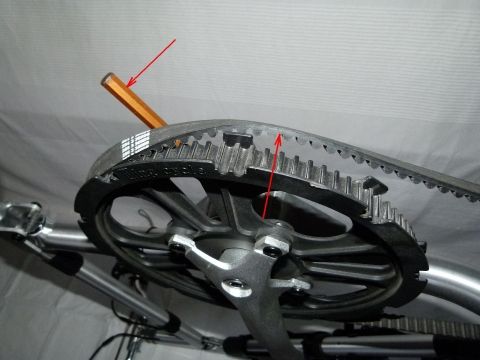
a. Move the old 1440 belt as near as possible to the locking mechanism
b. Take the new 1360 belt in the right hand and grab the bottom tube simultaneously
c. Grab the steering tube with the left hand below the frame lock
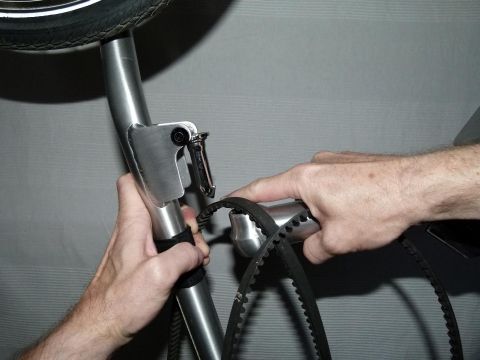
d. Open the frame lock with the left thumb, then push the bottom tube downwards with the right hand
e. Let the old belt fall down with a little help from some spare fingers ![]()
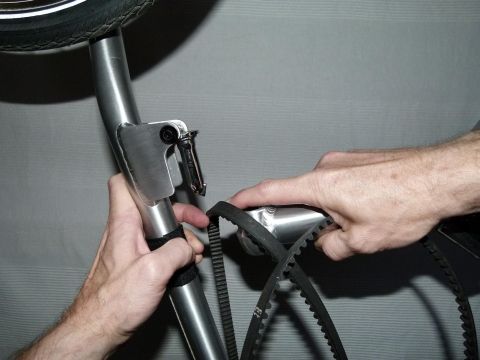
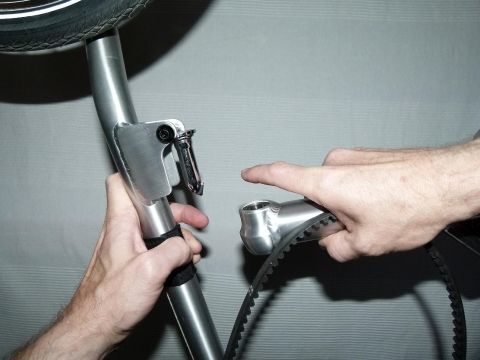
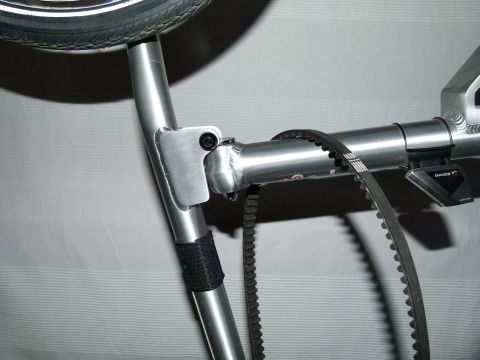
f. Contrive the new belt over the bottom tube
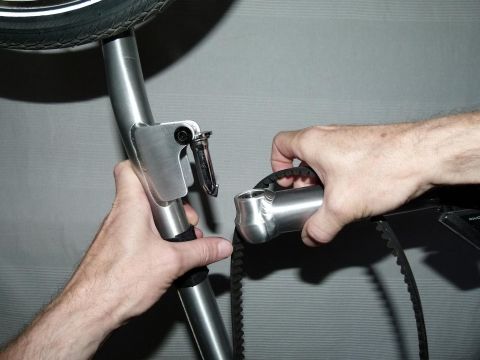
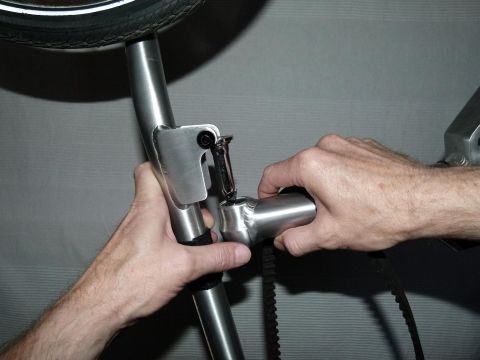
g. Lock the frame again
-
Put the belt over the freewheel and push the wheel onto the axle (caution: do not clamp the belt between the freewheel and the lower caliper mounting of the frame)
-
Remove the big groove nut from the Schlumpf drive, push it into the bottom bracket mount, hold the belt between drive and frame and be careful not to clamp the belt. Secure the drive with the groove nut, do not tighten it yet
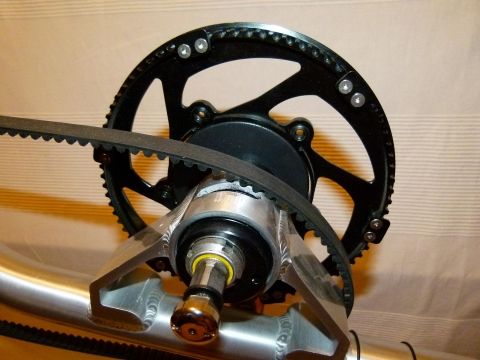
-
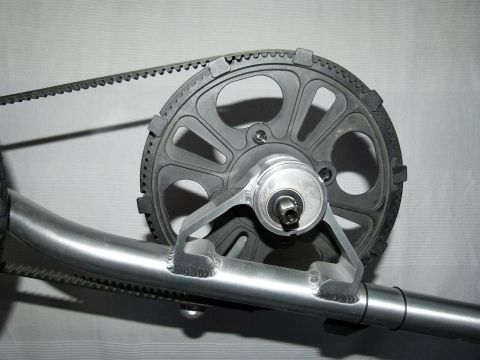
Move the drive to the lowest belt tension position and pull the belt over the belt wheel from inside
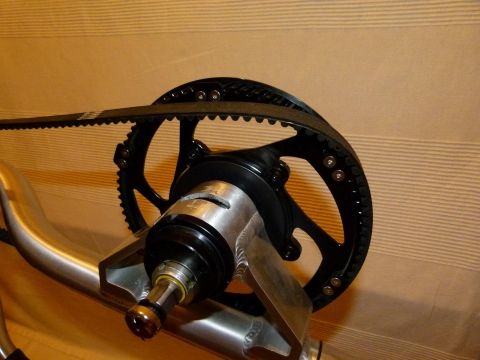
-
Unscrew the kick shift button and the crank bolt with its washer
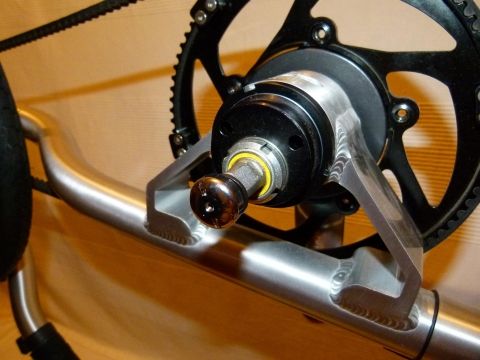
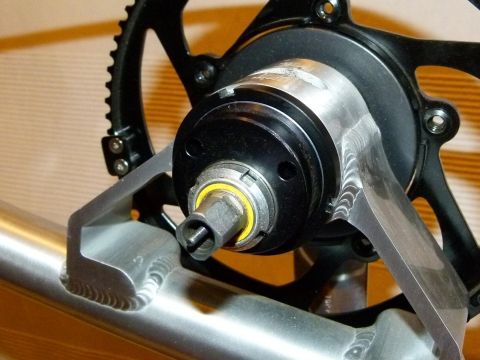
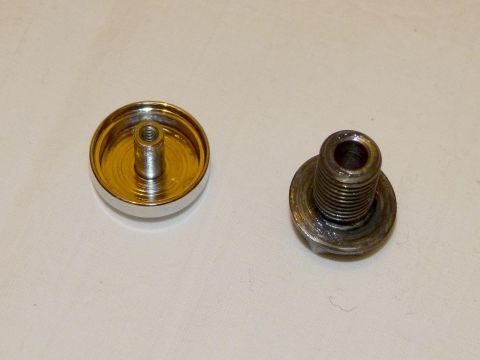
-
Push the single crank onto the axle and secure it with bolt and washer (caution: do not use a thread locking compound like Loctite on Schlumpf parts!)
-
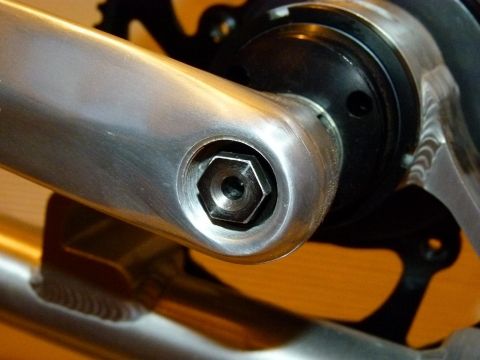
Tighten the crank bolt to a torque of 50-55 Nm (40,6 lb ft) by using a 14 mm socket wrench (it’s recommendable to follow the instructions of the Schlumpf speed drive manual, chapter B-4/Axle bolts, to be found here: haberstock-mobility.com/Manual Schlumpf speed drive.pdf)

-
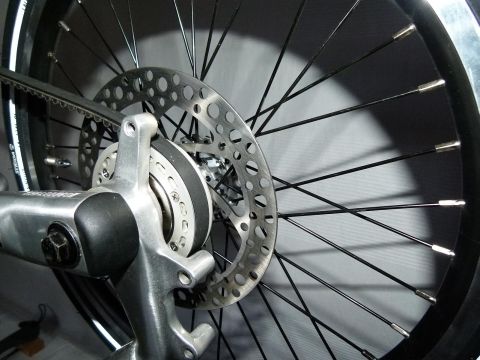
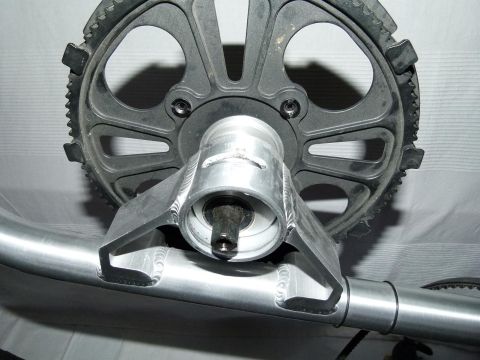
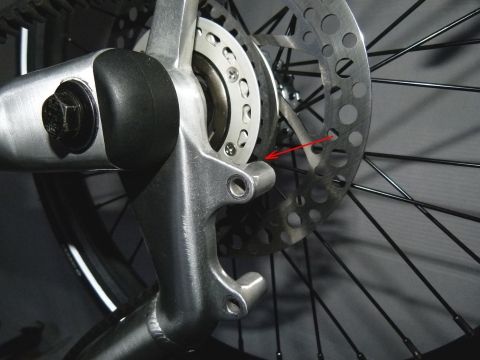
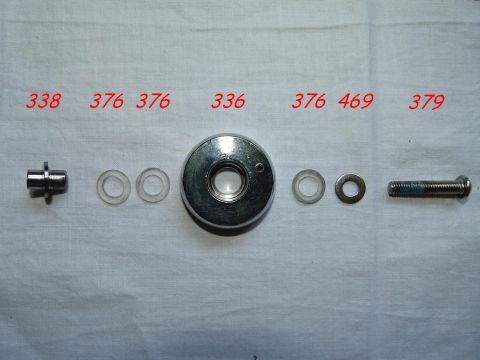
Mount the rear wheel bolt, washers, magnet counterpart and magnet spacer, for correct sequence please refer to the pic below or to the exploded drawing of the Strida manual (caution: do not tighten the bolt too hard - the magnet counterpart should be easily moveable - and use a thread locking compound – Loctite or similar!)
-
Mount the snubber bolt, bearing and washer (caution: washer between bearing and frame, do not forget to use Loctite!)
-
Mount the brake caliper (caution: use loctite!)
a. Take the caliper in the right hand
b. Push the first, upper washer onto the caliper

c. Slide caliper and washer behind the frame mount
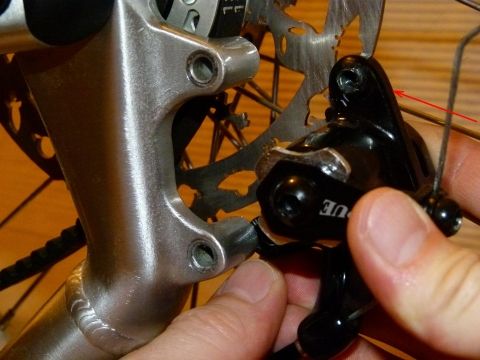
d. Press the caliper softly against the frame mount to secure the washer

e. Screw in the upper bolt (caution: do not forget Loctite!)
f. Push the second, lower washer onto the caliper
g. Rotate the caliper to the frame mount
h. Screw in the lower caliper bolt (caution: use Loctite!)
i. Tighten both bolts to a torque of 8 Nm (5,9 lb ft)
j. It might be possible that the brakepads must be readjusted, please refer to the Strida manual, page 17 Strida manual revised.pdf
-
Mount the belt tension bolt (and kickstand) and adjust belt tension. (caution: the speed drive manual recommends not to use Loctite on Schlumpf parts, I mean this bolt is an exception!)
-
Tighten the big groove nut really hard, recheck belt tension
-
Mount the kick shift button(s) and adjust it (them) carefully. For this step, please refer to the Schlumpf drive manual chapter B-5 or to the information supplied with the drive.
haberstock-mobility.com/Manual Schlumpf speed drive.pdf -
Finally, mount the pedals, alternatively kick shift plates can be used. Further information about these plates is also available in the speed drive manual. To use the forum search might also be useful, keywords „kick shift plates“ and „kick shift buttons“.
Have a safe ride with your new two-speed Strida!
![]()